
Winning Homebrew |
- Beer Foam
- Roggenbier
- Noble Hops
- Keezer Build
- Campden Tablets
- Kolsch Style Beer
- How Long Does Beer Last in the Fridge?
| Posted: 02 Jun 2021 08:01 AM PDT A glass of beer without a noticeable head of foam just looks wrong to craft beer fans. But have you ever wondered why those frothy bubbles are such an important component of the brews you love? This post will reveal the basics of beer foam and show you how foam makes a big difference in beer drinking. What is Beer Foam?Beer foam goes by several different names. At times, you will hear people refer to it as a beer head or as a collar. Regardless of the name you use, beer foam consists of gas bubbles that have risen to the beer's surface. Most often, carbon dioxide fills these tiny bubbles, but for some beers, nitrogen will take the place of carbon dioxide. However, the foam will only appear after the beer has been agitated. That agitation is often caused by pouring the beer. After that, magic and a special chemical reaction combine to cause that wonderful foam to form. The Chemistry Behind Beer FoamOne of the main ingredients in any batch of beer is grain. During brewing, those grains add molecules called hydrophobic polypeptides to the brew. That really long scientific name means that these molecules repel water molecules. They’re literally afraid of water. But, conversely, they have a strong attraction to the gasses that are present in beer. When they get all wound up, these hydrophobic polypeptides will attach themselves to any nearby gas molecule they can find. Then they valiantly try to save their water-hating polypeptide buddies by sticking to one another and the bubble walls as they rise to the top of the glass. So together, like the pieces of Voltron in the old cartoons, those hydrophobic polypeptides, and the gas in beer that they connect with form the beer head you have come to know and love. All of that foam not only creates an appealing head it also affects the flavor and mouthfeel of the beer as you drink it. Let’s learn how. 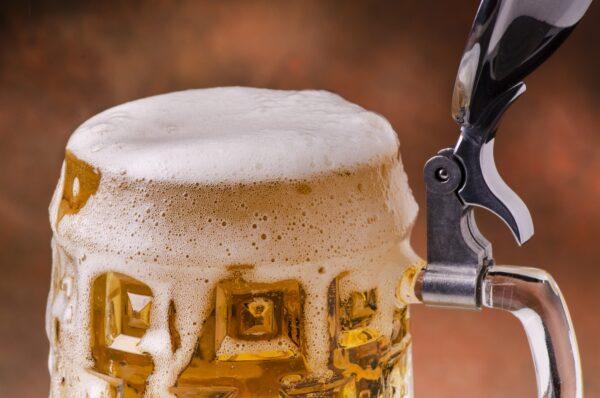 How Beer Foam Affects Drinking ExperienceYour ideal image of the perfect beer likely includes a healthy collar of foam. But did you know that foam can also play a functional role in making each beer more enjoyable? It’s true! Keep reading! Beer Foam Improves MouthfeelBeer foam can offer subtle flavor enhancements to your beer. Yet, while those flavor differences can be impactful, the positive effect of beer foam is due more to a physical sensation rather than a true perception of taste. When you drink a beer with a good head, you will swallow some foam with each sip. That foam can improve the mouthfeel of your beer, leading to a richer texture. Beer Foam and BloatingThat beautiful layer of bubbles can also make your beer-drinking experience much more comfortable. As every beer drinker knows, a few too many beers can lead to bloating, along with some other unwanted outcomes. Burping contests and other less classy events have been known to take place after a good round of drinking. Thankfully, a well-poured beer with a stable head can eliminate most of these unwanted happenings. A good pour will agitate the beer enough to release some of the gas and create a foamy head. A failed pour, or no pour at all, will fail to release that gas. Those beers will show little to no head at all. If you drink a beer that has been poorly poured, the unreleased gas bubbles will hit your stomach rather than appearing as foam at the top of the glass. If that happens, bubble formation will start inside your stomach. This is especially common if you eat food right after drinking a beer with no head. The interaction between the food and the beer will lead to the creation of bubbles inside you (see the part above about the freaked-out peptides). To avoid that undesirable outcome, make sure that you pour each beer with a nice foam head. That way, the gasses in the beer will escape before they can cause you extreme discomfort and unwanted attention from your drinking companions of the opposite sex. How to Pour the Perfect Amount of FoamThe advantages of beer foam are hard to deny. So, let’s now take a look at how you can achieve the perfect amount of foam each time you pour. Depending on the style of beer, you can get some impressive heads of foam with a little practice. Many people drink straight from beer cans or bottles. Or, if they’re at a bar, the bartender will pour the beer for them. So, naturally, this causes many people to be horribly under-educated in the art of beer pouring. The Proper Beer-Pouring TechniqueAlthough this may come as a surprise to some, there is a specific beer-pouring technique that will give you the perfect beer foam. Remember to use a “beer clean” glass completely free of detergents and other non-beer things. Follow these steps, and adoring fans will call you “foam master” and you will earn your degree in the science of beer pouring:
This method can take some practice to master. As you practice, you will notice that each step in the process will alter the foam differently. Tilting the glass at the beginning helps prevent too much foam from forming. Without using the 45-degree angle, your beer will likely froth over the top before you are done pouring, and you’ll be drinking overpriced air instead of beer. Tilting the glass into an upright position towards the end is what builds up the foam. Completing this step too late can cause a lack of foam and all the associated issues we mentioned earlier. Take some time to perfect your beer-pouring technique. After a few tries, you should gain the skill you need to create the perfect head for every beer you drink and be the envy of your friends. ConclusionBeer foam is more than a pretty sight. It can drastically alter the quality of the beer you drink. A thick collar of foam is a sign that the bartender poured your beer the right way. It also boosts the overall flavor and mouthfeel of your drink. So next time you sit down at the bar for a brew, make sure there is a nice head so that you can get the most out of your beer. After you’ve mastered making perfect foam, why not move on to learning how to make beer itself? The post Beer Foam appeared first on Winning Homebrew. |
| Posted: 02 Jun 2021 07:47 AM PDT Roggenbier, or rye beer, is a Bavarian beer style currently enjoying a resurgence in widespread awareness. In the Middle Ages, a nobleman decided to prohibit the use of rye in brewing, relegating it to obscurity. But a change in European law and an increasing interest in craft and exotic beers among independent craft brewers have put Roggenbier back on the craft brewers' map. First, though, what is Roggenbier? What Is Roggenbier?Typically, beer is made from barley, hops, and yeast. However, Roggenbier is made with malt rye. It's composed of anywhere from 30-60% rye, although most Roggenbier averages 50% rye in its makeup. Usually, a Roggenbier is an ale or lager. It is a distinctive straw color and consequently classified as a Weissbier, or a white beer. While Weissbier has since evolved to reference only wheat beers, historically, the classification was wider-reaching and encompassed any pale-colored beer or ale. The grain involved in the brewing process, whether rye, wheat, or barley, was irrelevant. TasteThe use of rye in Roggenbier gives it a distinctive, spiced, and grainy taste. The heat of the spicy flavors makes it an ideal light drink for a winter evening. It's not an overly bitter drink, either. The discerning drinker may notice citrus or vanilla flavors in a traditional version of brewed Roggenbier. Roggenbier is also naturally cloudy or turbid. This is because rye beers predate the invention of beer filtration in 1878. The result is a tart, aromatic rye beer with earthy undertones. And because of the beer's lightness, many craft beer connoisseurs say it tastes mild compared to standard hops.  The History of RoggenbierThe history of Roggenbier is a complex and interesting one. The beer itself has existed in some way, shape, or form since the 600s. At the time, the Sumerians and Babylonians used barley to create beer. Late Era Egyptian tombs depict a prominent use of barley or barley cakes blending with water for what presumably became beer. Roman historians Pliny and Tacitus would credit the Middle East with the brewing techniques used in their time. They also describe the Angles, Saxons, Celts, and various Nordic tribes as ale drinkers. This is because it was a common belief that water carried disease and was, therefore, unsafe. The industry thrived partly due to the fact that Medieval monasteries took over and developed the brewing craft. Like scribe-work, brewing kept the monks occupied and the monasteries solvent without affecting the monks' cloistered existence. But while most ales used barley in the brewing process, the popular grain wasn't native to all ale-drinking climes. Accordingly, many brewers began to produce their ale using whatever grain was on hand. For many brewers, that was rye. However, increasingly bad harvests strained grain supply, and rye fell out of favor at monastic breweries since monks rightly believed the people would want to prioritize bread-making with what grain they had. Bavarian Purity LawThe introduction of the Bavarian Purity Law of 1516 was significantly affected by the monastic decision to reserve rye for breadmaking. The law, introduced by a Bavarian nobleman, stipulated that only water, hops, and barley could be used in the production of ale. Barley was used in brewing because it was widely accepted that it was an unsuitable grain for bread. Later, a combination of legal doctrine and social class changes meant that barley became a dependable bread-baking ingredient. Rye, meanwhile, was the bread grain of choice for lower-class and lower-middle-class bakers. Wheat-based bread was the provision of the wealthy. The purity law, or Reinheitsgebot, eventually took hold in Germany, where it survived various government transitions, including the Nazi election in the 1930s. More impressively, the 1516 edict persisted even after a 1987 ruling by the European Court that the Bavarian Purity Law was not only outmoded but actively prevented other countries from accessing the German market. While the 1987 ruling didn't overturn the law, it did result in a gradual relaxation of its observance. And as it relaxed, Roggenbier re-emerged. Beers Similar to RoggenbierRoggenbier may originate from rye, but it shares similarities with four other subtypes of beer in that they, too, are not made from barley. Weizenbier or WeissbierWeissbier, or Weizenbier, is a wheat-derived beer, so-called for its pale color. Wheat beer must be made with at least 50% malted wheat in brewing. However, some regions, such as Bavaria, use a higher percentage of malted wheat to balance the inclusion of barley in their weissbier. In North America, Weissbier is often called Hefeweizen because of its hazy presentation. This is because most wheat beers are unfiltered, causing the classic Weizen yeast to remain suspended and giving the beer its recognizable cloudy appearance. DunkelweizenDunkelweizen is also a wheat beer. The name originates from a German compound word meaning "dark wheat." Dunkelweissen has a darker color than its paler cousin, Weissbier, and is augmented by combining it with roasted malts. These give the beer an added spiciness and complexity absent from weissbier. However, like Weissbier, Dunkelwiessen requires at least 50% malted wheat for proper brewing. WeizenbockWeizenbock beers are hearty wheat beers brewed to bock strength. That is, they're made in the fall to be drunk the following spring. Like Roggenbier, Weizenbock is native to Bavaria and has far-reaching historical roots. Dating back to Medieval times, it was a popular beverage with monks during Lenten fasts because they saw it as a herald of the happier, hearty times promised by the coming Easter. It's a strong lager with a rich, dark color and full-bodied flavors. Whereas wheat beers typically use 50% wheat malt, as discussed, a Weizenbock usually involves closer to 60-70%. Because it's a bottom-fermented beer, you may find it helpful to roll or swirl the beer before serving to animate the yeast and create more flavor. Making Your Own RoggenbierUsually, a Roggenbier has an alcohol level of approximately 5%. And while it hasn’t always been the case, if you're brewing one of the modern versions of rye beer, there's typically a percentage of wheat malt involved in the brewing process. Rye can also be notoriously tricky to brew because it naturally absorbs more water as mash and quickly becomes gummy. While some independent brewers find this hard to work with, that shouldn't deter you from attempting to brew your own Roggenbier. MethodDecoction mashes are often, but not always, popular when brewing Roggenbier. If you decide against the decoction method, you can recover some of the sweetness it engenders by adding a small amount of Melanoidin malt to your Roggenbier. HopsThe other signature of a Roggenbier is the use of continental hops in the brewing process. Popular varieties include:
Because hops levels in Roggenbier should be low, it's unusual to use finishing or dry hops. YeastThe most prevalent sorts of yeast in Roggenbier brewing are Bavarian Weizen or hefeweizen yeasts. They produce an immediately identifiable taste of clove and banana that colors the rye beer flavor. The Roggenbier then ferments at a low temperature. This helps emphasize the flavoring of the cloves and stops esters or fruity flavors from manifesting. The finished rye beer can then be served chilled and carbonated for the best results. ConclusionRoggenbier is a drink with a long history that is currently enjoying a return to popular favor. It presents with a hazy appearance that is immediately recognizable to the ale connoisseur. Despite the use of rye malt, it's a light, spicy beer that is imminently suitable for summer evening consumption. There are challenges in making it from scratch, but none are insurmountable, and the result is a thoroughly enjoyable beverage. But if you do encounter any difficulties, get in touch. We'll do our best to get back to you as soon as possible. The post Roggenbier appeared first on Winning Homebrew. |
| Posted: 02 Jun 2021 07:24 AM PDT If you're new to home brewing, you might be overwhelmed by all the hops varieties available. Each type produces a brew with different characteristics, so it's essential to find the hops that will brew the perfect homebrew of your dreams. Noble hops are one of the many types out there. Each has various characteristics and brewing outcomes. However, do you know what noble hops are and why you should choose them for your homebrewing? If you're curious about what makes these hops so noble and want to see if they could be a perfect fit for you and your tastes, keep reading! What Are They and Where Did They Come From?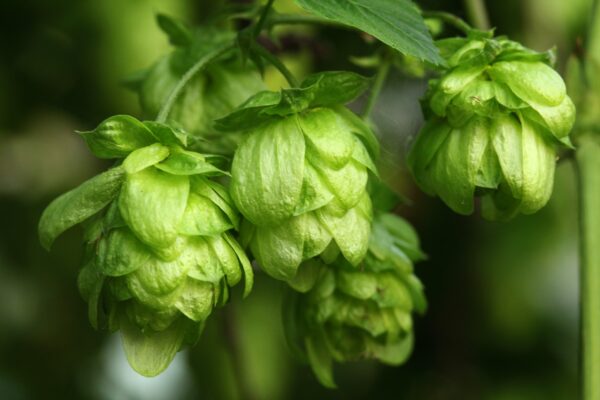 As with any wine grape variety, the exact region that hops come from greatly affects their signature flavors and makes them more appropriate for certain types of brews. When it comes to noble hops, these are traditional varieties grown in Europe and considered classics. If you think of hops as award-winning show dogs, noble varieties would be the ones with exceptional pedigrees that stretch back for generations upon generations. Historically, hops were first differentiated from each other and sold with a premium guarantee once growers realized that plants from certain regions outperformed others in quality when brewing medieval beer. German hop-growers introduced the use of a hop seal to guarantee product quality and pedigree around the 1500s. However, the term "noble hop" wasn't used until the 1970s, when it was introduced to refer to the historical use and top-notch, persisting quality of these varieties. Technically, the “noblest” thing about noble hops is their age-old marketing! You'll find the flavor of these hops to be authentically noble, enhancing the flavors of pilsners and continental lagers with herbal and floral notes, slightly spicy flavor, and delicate notes that are light on bitterness and heavy on complex aromatics. Noble hops are some of the oldest varieties that are still authentic to their original and top-performing growing regions. One of the benefits of these authentic varieties is that their flavor profiles are cemented by hundreds of years of single-region growing. If planted elsewhere, they'll still yield the same strong and resilient characteristics people love. Types of Noble HopsThere are four types of noble hops that you'll hear about as you research them for your home brewing purposes. The four notable noble hops all have German names; Hallertauer mittelfrüh, Saaz, Tettnanger, and Spalt. They are named after the German region in which they originate. While each type is slightly different and unique, each has low Alpha acid levels, meaning that they will produce a brew with a more delicate bitterness than other types of hops. You'll find that many of the most famous and desired brews from around the world start with noble hops or hybrid varieties derived from them. Hallertauer Mittelfrüh: Lightly Citrus, Spicy, Herbal, Earthy ProfileIf you're looking to brew a quality batch of beer, you might want to follow in the footsteps of some of Germany's oldest and most notable brewers by utilizing Hallertauer hops. This variety derives its name from the largest hop-growing region in Germany, where it is grown. It has a strong, desirable flavor profile that produces a pleasantly grassy earthy flavor balanced by fruity and floral notes. The Hallertauer is typically used as a single hop. Despite its stand-alone ability, this variety is mixed with others to create an even more robust flavored brew that is just as unique as the brewer. If you enjoy the refined, low-bitterness flavors of German-style Pilsners, then you'll want to give Hallertauer hops a try. Tettnang: Earthy, Spicy, Aromatic, Floral ProfileThis famous variety is also named after the region it's grown in, the Tettnang region in Germany near the Swiss border. They are aromatic and subtly complex. Tettnang hops are popular for use in any German-style beer or ale but are added into nearly any kind of brew to make the beer tastier. Since these hops are complex, many brewers suggest going easy on the brewing time, producing a flavor reminiscent of black tea. It's best used as a companion hop in a multiple-variety craft beer, so long as its flavors are paired well and allowed to shine. If you like a balanced flavor profile with a subtle floral and spicy note, then Tettnang hops should definitely be on your list to try. However, if you can't get your hands on some, this variety is genetically similar to the next variety we'll discuss. They are used interchangeably. Saaz: Floral, Spicy, Mildly Sweet ProfileSaaz hops are notable, being the only noble hop historically grown outside of Germany. This native Czech variety is prized for Czech Pilsner and is its most quintessential and mandatory component. To many, these hops have a unique, piney note that drowns out any citrus notes, which is complementary to its low bitterness and crisp, clean flavors. Given its smooth, soft, elegant flavor profile, it makes a great addition to any malt brews. Despite the subtle differences, Saaz hops are a great substitute for Tettnang hops and vice versa due to their shared complex and distinct flavor profiles that can elevate your unique homebrew. Spalt: Woody, Floral, Spicy ProfileFrom the Spalt region of the Bavarian town of Nuremberg, this variety is a classic—old but good! Like other noble hops, its aromatic qualities beat out its bitterness, giving it that delicate quality that attracts brewers to it. This was the first of the noble hop varieties, and in fact of any hop variety, to be guaranteed by the German hop seal, which ensured quality and origin documentation even in the early eras of hop production. This variety, which originated in the eighth century, is a versatile mainstay for pilsners, helles, and any variety that harkens back to a traditional European taste. As one of the most popular varieties, it's excellent for dry-hopping brewing methods and late boil additions. When To Use Noble HopsNow that you know about the types of noble hops and have chosen a favorite, let's talk about how to incorporate them into your homebrewing! While your brewing choices are limited only by your tastes and creativity, you'll want to incorporate them first into one of several types of brews that they're best associated with. European lagers, such as pilsners and helles; German ales; Belgian ales; American wheat beer; and American blonde ales all benefit greatly from the delicate and light-bitterness profile of noble hops. These hops are also higher in essential oil than other types of hops. They make great additions to produce nuanced and complex flavors. How to Get Noble HopsFor homebrewing flavor purposes, noble hops are a great choice. However, since they're of such a high standard, they are hard to come by in the States. While you can often find American-grown versions of these varieties, the flavor profile is altered from the original DNA. Many retailers will offer dual varieties of noble hops. They should be easily distinguishable by their name, which will indicate that they were grown in America versus Europe. If you've had noble hop brews before and are expecting a replica of that flavor, then you'll likely be disappointed by American hop varieties. But if you want to experiment, they are still worth a try and are a decent starting point. However, substitution is possible if you keep your eye on the most important components of noble hops: low acid and bitterness and high essential oil concentration. According to experts, each noble hop variety has several regular hop varieties that can provide a decently close dupe if needed. For Saaz hops, Lublin, Sterling, or Sladek hops can provide a closely replicated profile. If you want more of a Tettnanger taste, then try the Fuggle hop variety (and don't forget that you can also interchange Saaz and Tettnanger hops with each other). Hallertauer hops can be passably comparable to Mt. Hood and Liberty hop varieties, and the Spalt variety is interchangeable for Strisselspalt hops. How to Use Noble HopsOnce you've procured your noble hops or substitute, it's time to get brewing! As we've mentioned before, these varieties are commonly found in lagers, ales, wheat beers, and any other kind of smooth, aromatic brew. Use them in your homebrewing the same as other hops. They can even lend themselves to dry hopping (especially Spalt hops), which is perfect for enhancing the exotic aromas of delicately and complexly flavored brews. Once you get comfortable using noble hops, the sky's the limit! You can branch out and try different methods to experiment with their effects on flavor. Storing Noble HopsOne crucial component of incorporating noble hops into your homebrewing routine is proper storage. You have to be extra careful with the storage of noble hops because of their high essential oil concentrations. These components make noble hops' shelf life a little more volatile since light and heat exposure can cause essential oils damage and deteriorate the hops. You want to make sure your hops are as fresh as possible upon use. If you need to store them, make sure to do it well! You don’t want to plan out the perfect European brew to find that your brew supply has been ruined because you failed to preserve your hops correctly. Proper storage for noble hops includes tight sealing and low temperatures. The conditions inside your freezer are perfect. But even then, storage of fresh, whole hop heads for too long will still dull the flavor notes and dampen their effect on the end product of your brewing. When ordering your hops, there's often not much you can do about how they are shipped to you. In many cases, especially if you are ordering foreign varieties from overseas, the hops are exposed to damaging heat, light, and air that will diminish the quality of your hops. Inspect ordered hops upon arrival for swelling, which is a key sign that they've spoiled in transit. It's helpful to research the company you consider ordering from upfront to see if they take special precautions in shipping the product to avoid such conditions.  Final ThoughtsHopefully, you're now ready to dive feet-first into the rewarding world of smooth, austere-tasting European brews, all from the comfort of your own home. While there are many hops to choose from, noble hops and their substitutes will provide you with the classic, smooth, delicious beer flavor you’ve come to expect. Make sure to choose your variety carefully to match the flavor profile that most appeals to you. After that, you may have to work a little harder to find and purchase your chosen variety, but it will be more than worth it once you have that smooth, aromatic, finished product in your hand. The post Noble Hops appeared first on Winning Homebrew. |
| Posted: 02 Jun 2021 07:11 AM PDT The idea of enjoying their favorite beer on tap at home is a dream come true for beer enthusiasts. Once you enjoy the fresh taste of brew on tap, you’ll never settle for less. A keezer build is a fun way to create a unique keg refrigerator or keezer to enjoy your favorite brews with ease. Most people may think of it as a clunky, old-fashioned appliance that serves a valuable purpose, though without the esthetics. Creating a keg refrigerator (kegerator) or keezer is also an excellent opportunity to enhance your home with bumper stickers, quotes, and décor to personalize your space. It’s also a fantastic conversation piece and a great way to enjoy a delicious beer with friends and family. How to Build a KeezerBefore you begin your project, you’ll need a list of the equipment to get started. Though it is a simple design, this part of the process may seem complicated at first, though you’ll find most supplies are inexpensive and easy to order online. The equipment and supplies can be divided into two main sections: parts for the gas section and parts for the beer section. On the gas side, you’ll need the following items to begin your build: 5 lb. CO2 Tank Zebra DNA Luxfer L6X Aluminum CO2 Tanks with CGA320 on/off Valve (5 LB, Brushed)
At first glance, you’ll notice a wide range of CO2 cylinders, tanks, and canisters available to purchase for your keezer. The 5 lb CO2 tank is perfect due to its lightweight, damage-resistant construction. In addition, it’s durable and can handle 2.5 times service pressure with consistent success. This tank option is ideal, esthetically, for any plan. You’ll also need to purchase a 4-way CO2 Manifold, hose clamps, and a flare nut and barb. These items are available through a local homebrew supplier or online store. Gas Lines 10 Feet - 5/16" ID 7/16" OD Clear Vinyl Tubing Food Grade Multipurpose Tube for Beer Line, Kegerator, Wine Making, Aquaponics, Air Hose by Proper Pour
You’ll need a minimum of ten feet of 5/16″ width gas tubing to construct your homebrew system or beer line. It’s inexpensive, multi-purpose, and made of non-toxic materials. If you have experience with soda making or creating a unique kombucha brand, you may have spare tubing already available. Gas Ball Locks Sale  PERA 2 Pair Ball Lock MFL Gas&Liquid Beer Quick Disconnects Set keg coupler, 1/4", gray and white
Gas ball locks provide a secure connection between lines and are easy to disassemble for cleaning. They are made of food-grade materials and easy to locate online or with your purchase of gas tubing. A Primary Regulator with a Dual Gauge SPARC Premium CO2 Regulator and Gauge 0-3000PSI CGA320 2YR USA Warranty
You’ll find dual gauge regulars are relatively inexpensive, made from durable brass, chrome plating, and materials that fit well within your keezer. Constructing the Beer Section or Keg of your KeezerWhen you construct the beer part of your keezer, you’ll find it’s easier than you think and requires just a few standard items to build. The central part of this section is the Cornelius keg or kegs that hold your favorite draught beer. Your ideal size is 2.5 to 5 lbs, and depending on how large your keezer is, you can safely fit more than one keg inside. Cornelius or “Corny” Kegs for your Keezer Varies - AMCYL CKN3-SH 3 gal Keg New Ball Lock Beer, Soda or Tea, Silver
Generally, each keg doubles in weight once they are filled, and the main components include a draught-side post, a gas-side post, and a lid. Some kits may offer several parts of the keg for your homebrew project together, though it’s easy and relatively inexpensive to buy them separately. Faucets for your Keg Perlick 630SS Stainless Steel Draft Beer Faucet
Keg faucets are stainless steel and resist wear and tear. The ideal faucet offers a vertical angle which provides a thorough draining process when you pour. Perlick is a good quality brand to consider for your choice of faucet. Shank Beer Faucet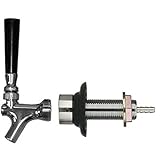 Bev Rite CPCCM201 Draft Beer Faucet and Shank Kit, Qty 1, Chrome
You’ll need high-quality beer shanks that include a chrome finish and are wear-resistant. Most brands offer excellent grade brass and chrome, with two in a pack. Additional items you’ll want to include are tap handles (usually available in sets of six or more) and a quarter-inch of barb to assemble your keg and prepare to enjoy your draft. Some people even go one step further and install a beer gun. Finally, you may consider a few accessories, such as a wireless dehumidifier, an external thermostat, and a chart to determine the carbonation level you’ll need. Designing your KeezerNow that you have all the supplies and equipment, the fun part begins! You may find the process a bit challenging at first, but it really is easy to assemble. Maintenance and cleaning are a bit more work. However, you’ll get used to it and establish a routine that works best for your operation. When you initially set up your brew system, you’ll need to decide to build a keg refrigerator (kegerator) or a keezer (keg freezer). Overall, a keezer is ideal for saving space and gives you more options to design and personalize. A chest freezer is relatively inexpensive and only needs to be large enough to fit your equipment – 9 cubic feet should do the trick! You might want to consider keeping some space available for cooling a few beer glasses, as well. Choose Your KegsThe most popular keg for your keezer is the Cornelius or “Corny” keg we mentioned above. Back in the day, they were often used in restaurants to create soda and have since become the standard for brewing beer at home. There are several types of kegs available, which include the ball lock and the pin lock. Either type of Corny keg is ideal, and if you have a set at home, you can easily fit them into your keezer. Setting up the Gas and RegulatorsAll you need is a 5 lb CO2 tank to get started. If you choose a larger tank, it will obviously cost more. Still, it may be worthwhile if you plan to pour beer often. A gas regulator offers you the option to set the gas pressure in each tank separately or keep them the same. If you customize the pressure, you’ll need to set a PSI of 35 for the first regulator and a setting between nine and thirteen for outgoing tanks. Installing the TapsIn most cases, you’ll need to drill a hole in the freezer’s lid to install the taps through a beer faucet tower structure on top. If you’re concerned about the damage this will cause, you may want to consider using an older freezer that’s no longer under warranty. Another option to consider is building a wood collar around the perimeter of the freezer to dispense draft beer through faucets. This process will initially create more work for you, but building this collar-like structure will preserve the freezer’s integrity. You can also extend your equipment outside the freezer if it doesn’t adequately fit inside. Keezer collars are typically built of wood and create a beautiful vintage or classic appearance. This box-like structure extends the top portion of the freezer and provides additional space to install all of your parts without impacting the overall structure. Building Your Collar and Selecting the MaterialsThere are literally dozens of wooden collar designs, and finding the correct type of material for your build can be difficult. Keep your focus on durability. You can choose a cheaper wood for the interior, such as pine, and a more resilient option for the outside, such as oak. It’s also important to insulate the keezer collar and ensure there are no spaces between the edge of the freezer and the wood frame. This step is crucial if you entertain lots of guests and want to prevent damage. After you’ve chosen your wood, you’ll need a jar of wood stain, wood conditioner, varnish, and weatherstripping. You’ll also need to purchase at least 14-15 feet of pine (for the interior) and another 14-15 feet of oak or other solid and durable wood for the exterior of the collar. Finally, you’ll need the “nuts and bolts” to assemble all the parts, including nuts, washers, wood screws, brass bolts, and gusset angle brackets. Installing the Faucets and ShanksPerlick is one of the best brands of faucets for your keezer, as it’s less likely to get stuck like standard faucets made for beer. Even though they cost more, they’re a good investment because they last longer and offer a quality pour. Perlick faucets are also beautifully designed and accent wood collars exceptionally well. Four-inch shanks are installed on each faucet. They connect to each beer line, making them easy to access from all sides. Putting it All Together with a CollarBuilding your keezer will take a bit of time, so it’s best to set the schedule you need for every step of construction. Despite all the work involved, the process is exciting and gives you the satisfaction of creating a brewing machine that will pump out lots of delicious draft beer for your guests. You’ll need to remove the lid from an old (or new) freezer to start the process. Ideally, an older freezer is best if you’re looking to avoid unnecessary costs and possibly an angry spouse. Measure the top of the freezer to determine the dimensions you’ll need to build the collar. Next, cut the pine or inner wood pieces and assemble them using the angle brackets and wood screws. These will act as butt joints and provide you with the basic frame of the collar. Measure the oak to cut the outer wood pieces to fit closely to the pine. You’ll want to ensure the pieces are cut accurately so they clamp on well. The oak should be slightly higher than the pine and hang below the pine by about two inches. This placement doesn’t need to be consistent around the entire perimeter of the keezer, just the front and sides, as no one will likely use the back section. Formatting the Collar to Fit the KeezerOnce you have the frame installed, you’ll want to mark where to drill the bolt holes to secure the collar pieces. Typically, twelve evenly spaced bolts are required. Once they are inserted, secure them with nuts and washers. Then, when you place the freezer lid on top, you can attach the hinges to the collar frame instead of the freezer, which effectively extends the entire unit. Now that you have the bulk of the collar done, you can decide where to install the taps. It’s essential to know where all the equipment is located inside the freezer, as well as the number of taps you’ll use. Drill the shank holes for each tap with a heavy-duty drill, as the layers of wood can prove challenging. Each hole should be around ¾ inches wide. Test the shanks to ensure they fit, and if not, you can widen each hole to adjust. Get Creative with Your CollarOnce all the drilling and cutting are done, you might want to take a break before you stain the wood. When you’re ready to stain, use a conditioner first, applying evenly, and allow enough time to dry – about 24 hours. Apply your choice of stain, which requires another 24 hours to thoroughly set, then add a semi-gloss coat to finish the surface. When your frame is complete, attach the weatherstripping to the pine inside, then use clear silicone to seal any openings and fully insulate the collar. Allow everything to dry before you reattach the lid, then insert all the faucets, shanks, and accessories. You’ll also want a temperature controller to regulate your keezer temperature. You have made significant changes to the structure and volume of your freezer, so its onboard thermostat may not be able to control the temperature as well as you think. You may also want to add a drip tray and CO2 manifold. Enjoy Your Custom KeezerNow that you’ve built your first keezer, you’ll want to enjoy it as much as possible! You may cringe at the idea of cleaning and maintaining the unit, though, in the long term, it’s worth the extra effort. A custom-built keezer is a fantastic investment that pays off substantially. You’ll offer the best homebrewed draft and a tremendous esthetic for every party or any guest you entertain. Grab some chalkboard paint and make a square to write down what beer selections you have on tap. Install some LED lights under the edge of the collar to add a cool lighting effect. Attach a bottle opener to the side in case someone has the nerve to bring beer bottles to your party. There is literally no limit to your personal preference when designing your finished product. Frequently Asked QuestionsOnce you begin to enjoy the benefits of a new keezer, you may have some questions about ongoing care and maintenance. Do I need to add a dehumidifier?Keeping a dehumidifier near the keezer is an excellent way to avoid excess moisture build-up. However, this option may not be required if your space is well ventilated. Is a fan a necessary accessory?No, but if you do decide to install a small fan, it should be attached to the collar, pointing downward, to keep the cool air circulating inside. You can either buy a small battery-operated fan or assemble the parts from an AC cooling fan, a corner brace, hinges, and screws to attach the device. Is building a keezer expensive?It’s an inexpensive project, especially if you already have some materials handy. Even if you have to buy everything, it’s not a significant investment. An old freezer, standard tools, kegs, or tanks from soda-making and other projects are perfect pieces for building a keezer. The post Keezer Build appeared first on Winning Homebrew. |
| Posted: 02 Jun 2021 07:05 AM PDT Like most ventures, making your own wine or beer takes practice before the end product can really be enjoyable. Unsuccessful attempts at homebrewing usually result in a very gross, very hard to choke down concoction that would not be out of place in a witch’s cauldron. We know from experience that a terrible batch could be due to too much yeast in the brew, chlorine in your tap water, or even unsanitary equipment. Even if you follow all the steps to perfection, there are a few additional things you can do to make your homebrew taste better and even safer to drink. One of these is to add Campden Tablets. How to Use Campden TabletsIn basic brewing, there are four main ways to use Campden tablets: treating must and wort for wine and beer-making, counteracting possible oxidation during racking, purging chlorine from brewing water, and sanitizing brewing equipment. Sanitizing wine and beer prevents the growth of bacteria and yeast. The tablets accomplish this by creating an inhospitable environment for wild yeast. One thing we learned from endless trial and error is that homemade cider is commonly affected by acetobacter contamination; acetic acid bacteria grow unchecked and spoil your creation. Campden tablets easily dispose of acetobacters, preserving the taste of your cider and keeping it from going bad. Adding the tablets to homemade wine or beer before racking (bottling) prevents unknown airborne bacteria from contaminating your bottle. In addition, the sulfite in the tablets acts as an antioxidant to trap oxygen, so it can’t adversely affect the alcohol. Whether you’re making homemade cider, wine, or beer, you must first remove chlorine or chloramine from the water you plan to use. Most tap water contains traces of chlorine or similar compounds. These elements will kill yeast and make your beer and mead taste especially terrible. Chlorine will sometimes dissipate on its own, but chloramine needs a Campden tablet for removal. Take our advice: having clean brewing equipment is imperative if you want to reduce the possibility of mold and bacteria growth. Some homebrewers claim that the alcohol you brew will automatically sanitize all of your equipment, but this isn’t true. Your alcohol-in-progress could leave trace amounts of yeast or bacteria inside the containers or tubing, which could grow inside your next batch and become potentially harmful. Sanitizing these potential growths will ensure your next brew comes out clean. What You’ll NeedYou don’t need a lot of equipment to use Campden tablets, but you do need something to crush them and something to stir with so that the Campden powder will dissolve smoothly. Mortar and PestleTo get the best use out of your Campden tablets, you will need something to crush them with. Usually, this is done with a glass mortar and pestle, as these tools easily grind and crush ingredients, and the glass will prevent any flecks or pieces from becoming absorbed or lodged in the utensils themselves. Stirring InstrumentFor some of these methods, you will need to beat the powder from your Campden tablet to get it to dissolve into a liquid, which could take several minutes. The best instruments for this are either an egg beater or a stainless-steel fork. Some brewers also swear by sanitized bamboo whips. Campden TabletsThe number of tablets you need to use depends on what you intend to do and how much liquid is involved. When using the tablets to prevent yeast growth or oxidization, you will generally only need one single tablet per five gallons of liquid. Removing chlorine usually requires only half a tablet, and sanitizing your equipment uses about 16. Treating Your Must or WortOne tablet per gallon or 3.8 liters is enough to treat must or wort. Step 1: Grind up the TabletCrush the tablet into powder. Using a glass mortar and pestle is the easiest way to accomplish this. Step 2: Add the TabletAdd the powder to your wine must or beer wort. Preventing OxidationUse one tablet for one gallon or 3.8 liters. Step 1: Grind the TabletJust before you rack your wine, crush a tablet into powder. Step 2: Mix with WaterMix the crushed tablet with one-third cup of hot water. Beat the mixture with a stainless-steel fork until the tablet completely dissolves. Step 3: Mix with AlcoholAfter dissolving the tablet into your water, remove about one cup of wine or beer from your supply using a siphon or wine thief. Next, mix the water with the alcohol, whipping it together to break up any forming lumps. Then, return the new mixture to the carboy. Step 4: Rack the WineRack the wine into its secondary container. Step 5: Repeat RackingRepeat steps two to four by adding Campden tablets to your wine when you rack the third and fifth times, skipping the second, fourth, and sixth racking. Purging ChlorineRemoving chlorine and chloramine from tap water requires one-half Campden tablet for every five gallons, or 20 liters, of water. Step 1: Determine the Amount of WaterGather all the water you intend to use and store it in a large container. Step 2: Prepare the TabletsDetermine how many Campden tablets are needed to treat the water. For example, if you have five gallons/20 liters, use a sharp knife to break one tablet in half. Step 3: Crush the Tablet(s)Use your mortar and pestle to grind the tablet into fine powder. Step 4: Add to WaterPour the ground tablet into the desired amount of water. It will take up to 20 minutes for the tablet to remove traces of chlorine or chloramine. Sanitizing EquipmentTo sanitize, you will need 16 tablets for every gallon of water. Step 1: Prepare the EquipmentFirst, wash the equipment to remove any dirt or debris that might be caught inside. Sanitization will not work if there’s still gunk stuck to any part of your equipment. Then, place all the equipment you wish to sanitize inside a large bucket or container. Step 2: Prepare the TabletsGrind up all the tablets you intend to use. An easier alternative to crushing and mixing the tablets is to buy a powdered form and pour that into your water to make a sanitizing solution. The powder equivalent is one-sixteenth teaspoon per tablet. Step 3: Add the SolutionPour your sanitizing solution (Campden tablets and water) into the bucket with the equipment. Step 4: Seal the BucketSealing the bucket traps the sulfur dioxide gas produced by the solution. Sulfur dioxide cleanses the equipment, not the solution itself, so you must seal the bucket to sanitize properly. Step 5: Sanitize and DryIt takes about 10 minutes to sanitize your equipment fully. When the time is up, remove your equipment from the bucket and allow it to air dry. Frequently Asked QuestionsWhat is a Campden Tablet?A Campden tablet sterilizes wine and beer to prevent bacteria growth. They also ensure there is no mold and yeast growth from wild yeast. They are a sulfur-based product, either potassium metabisulfite (KMS) or sodium metabisulfite (SMS). SMS has more sanitizing properties for wine and beer-making equipment, while KMS is slightly better at treating the alcohol directly. Do Campden Tablets Kill Bacteria?Yes, Campden Tablets kill harmful bacteria specific to wine and beer, making your homebrew taste better and safer to drink. They will also remove chlorine or chloramine from tap water and remove any bacteria inside your brewing equipment. Will Campden Tablets Stop Fermentation?No, the tablets do not stop beer or wine fermentation. However, they will slow the process for a period of time, so the wild yeast in musts and worts cannot grow. This slowing down of fermentation ensures that the wine or beer will not turn overly yeasty. Because the tablets don’t stop fermentation, they cannot stabilize the wine. You must look into other methods if you want to find a stabilizer. Are Campden Tablets Necessary for Wine? Yes, they are. Without sulfite, finished wine can spoil or even turn into vinegar. But, of course, this is a process, and your wine will only ever spoil over time. But to keep it drinkable for a long time, Campden Tablets will prevent any bad changes to the wine’s chemistry. Do Campden Tablets Go Bad?Campden Tablets can go bad, but it takes decades, even as much as 50 years. SMS tablets, in particular, are preservatives. So, they won’t go bad for a very long time, perhaps even during your lifespan. Are Campden Tablets Bad for You?Campden Tablets are not bad for you unless you are allergic or intolerant to their active ingredient, sulfite. The amount of sulfites in Campden Tablets is around 2.5-4 ppm (parts per million), which is small enough that those sensitive to sulfites shouldn’t react. Therefore, a sulfite allergy will rarely result in anaphylactic shock when exposed to trace amounts in wine or beer. Nevertheless, it’s crucial to note the use of Campden Tablets on bottles to prevent possible allergic reactions in drinkers. The post Campden Tablets appeared first on Winning Homebrew. |
| Posted: 02 Jun 2021 06:58 AM PDT Kolsch-style beer became popular when top-fermenting beer makers tried to compete with the bottom-fermenting beer market in Cologne, Germany. You can enjoy this crisp, bubbly, light, delicious beer in the summer heat. You serve Kolsch in tall, thin glasses known as stange or rods. Officially Kolsch style beer has to be made in the Cologne region in Western Germany, but there are now brews from every corner of the world known as Kolsch style. The originals are slightly fruity, but as people have attempted to create new variations, there are now many other Kolsch beer styles. If you’re a craft beer drinker and don’t happen to live in Kolsch, you can still try a tall glass of this thirst-quenching beer. Keep reading to find out how brewers originally made this beer, how you can brew it at home, and the best way to enjoy Kolsch Style Beer. HistoryKolsch-style beer first appeared in the early 1900s in Germany, but its history starts long before that. In the 1600s, there was a rift between the top and bottom-fermenting brewers. Germany, which already had beer brewing laws, added a ban on the sale of bottom-fermented beer. Fortunately for us, those 17th-century beer mandates allowed Kolsch beers to survive in modern times. People liked the bottom-fermenting type of beer so much that the top-fermenting breweries had to make changes. They started making hybrid top-fermenting beer that they aged after making. This new process gave us more types of beer, like cream ales, blonde ales, and of course, Kolsch. The German beers grew in popularity in the early 20th century, up until World War II. After the war, many of the breweries that made Kolsch never reopened. But, there remained a small market for the Kolsch, and it still competed against the more popular bottom-fermented beers. It wasn’t until 1997 that the drink was recognized as a protected geographical indication. This process created rules for the making and distributing of the beer and firmly cemented Kolsch in German beer history as well as modern beer culture. Modern KolschThere is a good chance that the Kolsch beer you drink today isn’t an official Kolsch. Even though there is a solid market in that region, many of the exports aren’t official Kolsch beer by the official standards. American craft brewers make a Kolsch-style beer that uses many of the same procedures and methods as the Cologne breweries, but they are located all over America, not Germany. For a long time, these brewers tried to replicate the process entirely to give people the authentic taste of the regional favorite. Soon, they started to play with the process, adding flavors and tastes that could help them market the beer to new audiences. Today it remains a favorite summer beer among craft beer connoisseurs. They have added more fruit flavors, different malts, and even occasionally coffee flavors. All these experiments help keep this clean drinking beer fun, exciting and intriguing to brew and taste. Taste ProfileWhen enjoying a Kolsch, the most immediate taste you should be getting is from the malt. There should also be a slight sweetness, often with a fruit taste to it. As you finish, you should get the bitterness which helps give it a clean finish. The Kolsch fermentation process produces a beer that is usually a light to medium body drink. It has plenty of carbonation. It is a very easy-to-drink beer that doesn’t try to hit you over the head with bold flavors. These beers are not alcohol-heavy, coming in between 4.4 – 5.2%. For bitterness, they usually have IBU’s of 20 – 30, which makes them more bitter than a Bud but less bitter than most pale ales. AromaWhen you smell this beer, you will first notice the smell of fruit, a product of fermentation. This is usually cherry pear and apple in most Kolsch. The avid craft beer drinker will also sense hints of the malt and hops, but that can change depending on the brew. Occasionally you may also get notes of the yeast. Appearance You will notice a gold or light tan color in this beer. The head is white, but there usually isn’t a lot, and it may disappear quickly. It is a very clear beer, and most varieties won’t have much sediment obscuring your view through the glass. What to Pair it WithThis beer pairs best with hot and sticky days and doesn’t need food to enhance the experience. If you feel like having a snack or meal while enjoying this beer, light meals like salad and fruit can enhance the beer’s fruity flavors. If you are looking for something a bit more filling, this beer style pairs best with nutty cheeses, bratwurst, and bread. If you want something sweet to enjoy, light fruit-based desserts like tarts and fruit pies can pop with the Kolsch fruity tasty. The lightness of this beer, paired with how easy it is to drink, makes it work well with almost any food you want to enjoy. What Makes Kolsch Style Beer DifferentKolsch is a hybrid of the speed of top-fermenting beers and lagering that gives bottom-fermenting beers their taste. In some ways, this gives Kolsch the best of both worlds. You can get a lot of the great taste and crispy nature of bottom-fermenting, but make it quicker and easier. The lagering process of aging the beer does add some time, but it is not as much time as a traditional bottom-fermenting beer takes. Less time put into the beer usually makes it a little less expensive for the eager public to buy. ServingThe proper way to serve Kolsch is in stang. If you are doing a tasting in their native region, visit a craft brewery. Servers will bring these glasses to you on circular platters called Kranz or wreaths. Ordering in the traditional pubs isn’t necessary. When your beer is empty, you get a new one in front of you. The server adds a mark on your coaster. After you finish your last Kolsch, place the coaster on top of the stang, and then you pay for your beers. Now, that’s excellent customer service! You can experience this tradition at some bars in America, especially around beer festivals and large German heritage communities. How to Brew Kolsch Style BeerBrewing Kolsch-style beer is deceptively easy. The recipe is very straightforward. However, due to the light body of the beer, even the slightest mistake by the beer brewer is amplified. When you are picking your malt and hops, you want to stick with continental flavors. Avoid the citrus hops from America. Noble German hops like Spalt and Hallertau are great for your hop selections. Single pale malt is preferred for first-time brewing. You can enjoy some variation, especially as you become more comfortable with the process. Some recipes also add wheat to get a more pronounced head on the beer, but it’s not very common. The yeast is vital for this style of beer. Use the type of yeast suggested in most recipes to get the flavor you are looking to taste. Ale yeast is the preferred yeast for Kolsch style beers, with European Ale yeast leading the pack. You may want to lager or age the beer in a cold location to help get the clarity you expect. Homebrewing kits are helpful when making a great beer. However, if you are planning on trying many different flavors and enjoying the process, you may want to find a homebrew system to experiment with more methods throughout the entire fermentation process. VariationsAdding variation to this summer classic isn’t done as often as it is with some beers. The first attempts to change this beer were met with pushback from craft beer fans, but over time people have become much more open to new flavors and styles of Kolsch. Now you can find more fruit-forward Kolsch options, as well as brews that add more and differing hops to give it new tastes. Brewers can add flavors like coffee and vanilla. Some recipes add wheat malt. Many of these variants haven’t developed specific names yet, so you have to read about new Kolsch beers to see what they have done to the brewing process. One of the few things that don’t tend to change is the type of yeast. The yeast selection is extremely limited to get the flavor people expect in a Kolsch. Which Brand Should I Try?Due to its easy-drinking nature, breweries love to add a Kolsch-style beer to their menu. Its popularity among craft beer producers has led to a lot of choices when it comes to enjoying a beer. To get an idea of what you should be aiming for when you brew this beer yourself, here are some of our favorite Kolsch beers you can try from independent breweries. Best Kolsch From the Region: Fruh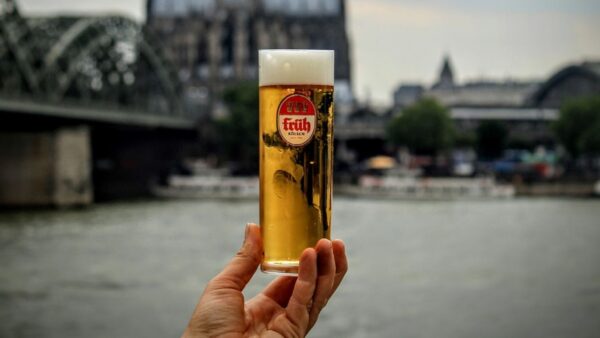 There are many options to try a classic Kolsch beer, but Fruh beats out some of their bigger rivals to be the best tasting Kolsch beer from the region. The beer presents very malt-forward, which helps bring an explosion of flavor with every sip. You can taste the yeast, which many people love about this style of beer. In the end, you get a nice bitter finish that rounds out the whole taste. Best American Kolsch: American Kolsch, Boulevard Brewing Co.This beer takes all the classic flavors that you love about Kolsch beer and replicates them. The only thing American about this Kolsch is where it is brewed; Kansas City, Missouri. When you drink this beer, you notice how well blanched the malt and hops are. It’s a very light beer that brings out the flavors of the yeast, with a little bit of vanilla to add sweetness. It is an excellent recreation of the original while adding intriguing notes. Best Fruit Kolsch: Tart Peach Kolsch, Ballast Point Brewing CompanyIf you like your beers to have a very fruit-forward experience, the Tart Peach Kolsch by Ballast Point Brewing Company, a well-established west coast brewery, is a great way to enhance the natural fruit flavor of the beer. The base for this beer still has the bready yeast overtones you have come to enjoy in a Kolsch. The added fruit doesn’t overpower the taste, and it doesn’t make it too sweet. Instead, it adds a tartness that helps make an already refreshing brew even crisper. Best Unique Flavor Kolsch: Koffee Kolsch, Huss Brewing Co.When you want to try something with a Kolsch base that adds new and unusual flavors, the Koffee Kolsch is an intriguing option. Huss takes its classic German-style Kolsch and steeps it in caramel and hazelnut coffee beans. The result is a hybrid coffee drink with an incredibly smooth finish. This Kolsch is a perfect drink to add to a morning tailgate at those late August football games. You get everything you need in a drink in one fun package. ConclusionWhether you want to brew your own or you’re just looking for a new beer to enjoy on a hot day, Kolsch can be an intriguing option. It is an easy beer to drink and make, but it is hard to master. It’s a beer that pairs with nearly everything, or you can enjoy your beer of choice by itself for a crisp and refreshing drink. Brewers made the beer to compete against popular bottom-fermenting brews, but it soon gained a following of its own. You can add a ton of flavors to Kolsch to make it your own, or you can enjoy the classic and have a crisp drink with notes of sweetness. It could very well be your next favorite craft beer! The post Kolsch Style Beer appeared first on Winning Homebrew. |
| How Long Does Beer Last in the Fridge? Posted: 29 May 2021 07:04 AM PDT You've made your best batch of home-brewed craft beer – a rich milk stout or maybe a hoppy IPA – bottled it and stored it to enjoy later. But will you? Even the best beer can go bad when it goes past its prime. Storing it at the wrong temperature can shorten its shelf life. Few things are as disappointing for a homebrewer as opening a bottle of ale only to find that it's turned bad and is virtually undrinkable. To make sure your homebrew is as good when you open a bottle as it was when you finished brewing it, Winning-Homebrew will answer that essential question: how long does beer last in the fridge? How Long Does Unopened Beer Last?The answer to how long unopened bottles of beer will last depends on the type of beer and whether it was commercially brewed or homemade. It's often best to drink lighter beers – pale ales, light lagers, weissbiers, and brown ales – first. Those are best consumed within 120 days of bottling or canning. Darker, heavier beers such as stouts and porters are best enjoyed within 180 days of bottling. Barrel-aged beers, imperial stouts, and sour ales will last longer than less robust varieties, and the time can make them more mellow. Generally, commercially brewed beers have a longer shelf life than homemade beer. Beers brewed in large quantities by commercial brewers can be stored longer than beers brewed in small quantities by craft brewers. The reason is in the steps taken by larger breweries to prevent the aging of their brews during transit. Drink those beers and serve them to guests, and your brews won't have time to age past their freshness date. Beer is brewed to be enjoyed fresh. Is Drinking Beer After Its 'Best by' Date Safe?The short answer is yes, it is safe to drink beer after its "best by" date. The date brewers put on their cans and bottles isn't a safety date but a date for optimal freshness. New Air, a manufacturer of beverage refrigerators, recommends drinking beer by the freshness date because it will taste better. Drinking an expired beer most likely won't make you sick or kill you, but it may leave you wishing you had a better-tasting beer. When Will Beer Go Bad?Generally, commercial beer won't have a noticeable change in freshness for six to 24 months after a freshness date. Darker, more robust beers will have less change over time than their lighter counterparts. Homebrewed varieties may have a shorter shelf life than store-bought beer. Knowing that their beers will have to travel hundreds of miles to stores, commercial brewers tend to take more precautions against their beers’ aging. How Does Beer Go Bad?Nothing lasts forever. Beer will eventually decay, just like any other food or beverage. Beer is made from plant materials such as wheat and barley that will go stale over time. Bacteria and chemical reactions will also take a toll after time. What Makes Good Beer Go Bad?Generally, three factors can shorten the shelf life of beer – light, bacteria, and oxygen exposure. Here we'll look at each. LightThere's a reason many beer bottles have a dark color. It's to keep out ultraviolet light. Exposure to light is one of the prime culprits in making good beer go bad. When UV light shines through beer bottles, it reacts with one of the chemical compounds in hops, breaking down the lovely hoppy-ness until the beer turns "skunky." Cans of beer keep out all light and stay fresher longer. If you like hoppy beers, look for them in cans or, if you're storing homebrew, bottle it in brown bottles. It will help extend the shelf life of your favorite double IPA. BacteriaMicrobial action makes all foods decay over time, and the same is true for beer. Bacteria are relatively rare in commercially brewed beer because breweries work to limit contamination. Homebrewers should do the same. The alcohol in beer does act as a natural preservative, and refrigeration limits bacterial growth. OxygenOxidation is part of the aging process that breaks down the chemical compounds in beer, changing its flavor. Since oxidation is caused by air leakage, bottled beer may be more at risk than canned beer. To keep beers' oxygen exposure low, store your beer upright instead of on their sides. What Goes into Setting a Best-by Date?Whether you are home brewing or buying a six-pack of beer at your local supermarket, you'll want to be aware of factors that affect the freshness of your beer and the setting of a "best by" date. Keeping this in mind will ensure you have nothing but fresh beer at home. DistanceHere's one reason why home brewers enjoy fresher beer. It doesn't travel hundreds of miles to reach your refrigerator. If your beer is brewed far away from where you live, that means it went on a road trip and may have been shaken or left in the sun along the way. Local beer will always be fresher, so supporting your local brewery will pay off in fresher beer. Again, homebrew has an advantage here, as it's brewed where it will be enjoyed later. PackagingBeer is kept fresher in cans because they keep out ultraviolet light and are tightly sealed, keeping out oxygen and bacteria. Still, there are some who like their cold beer in a long-necked glass bottle. Brown glass bottles keep UV rays away and protect beer against becoming skunky. Green bottles are also effective. Beers in clear bottles tend to have a shorter shelf life, in part because the clear glass doesn't block ultraviolet light. Also, the beers that do get bottled in clear glass bottles are usually lighter ones with a shorter shelf life anyway. PopularityThis only affects homebrewers if they make more than one type of beer and stow them away for later. Beers sold quickly in supermarkets, convenience stores, liquor stores, and beer shops don't sit around collecting dust, so they're restocked regularly with fresh bottles and cans. Less popular beers may sit on shelves aging. Also, consider the traffic in the store where you buy beer. If they don't have many customers, their beer won't need restocking regularly. AgeWhen you buy beer at your favorite supermarket or shop, take a look at the freshness date. If it is close to its freshness date or, worse, past its freshness date, purchase a younger beer. TemperatureBuying beer from a refrigerated case means that it was protected from aging in the store. A plus to this is that the beer you buy is already cold and ready to enjoy, making it easy to pick some up for a cookout or for watching sports with a group. Also, look to see if the beer was stored upright in the supermarket, preventing oxidation since less of the beer is exposed to oxygen. What's Best for Beer – Room Temperature or a Refrigerator?The best temperature for storing an unopened bottle of beer is 45 to 55 degrees Fahrenheit, which is colder than room temperature but hotter than a standard refrigerator. If you don't have a specialty beverage refrigerator or a 45-degree room, storing beer in your refrigerator is the best. Refrigerated beer will keep well for about six to eight months. If you do store your beer in your pantry or cabinets, store it upright in a cool, dark spot, keeping it away from direct sunlight. Keeping your beer cool should help it stay fresh for at least four to six months. What's the Best Way to Store Beer Bottles? Winning-Homebrew offers tips on a variety of home brewing topics, including the storage of beer bottles. These ideas could work for full bottles as well as the empty bottles you plan to refill after you brew your next batch. Note that the bottles are held upright in these recommended storage ideas. How Can You Tell if a Beer is Bad?If a beer has a skunky taste or odor, or if its appearance seems irregular, don't drink it. These are obvious signs that a beer is too far past its prime. Life is too short to drink spoiled beer, so toss it. Cheers to Fresh Beer!Beer isn't like a wine that gets better with age. The best beer is fresh beer. Although some robust beers such as barrel-aged brews and sours may age better than a pilsner and reveal more of their flavors, fresher is best. A bad beer will offer nothing but stale or even skunky aromas and flavors, and who wants that? If your beer is a few months or even a year or more past its "best by" date, open it to check it out. It may still be good. Most beers are fine to drink after their freshness date has passed. A skunky aroma or an appearance that looks off should be a sign that your beer has gone bad and that it's not worth drinking. Here's a roundup of tips for enjoying your homebrew and store-bought beer and storing it with freshness in mind: Rotate Your StockDrink older beers first to make sure you're always opening a fresh bottle or can. A forgotten 12-pack at the back of your pantry could go bad over time. Drink Your BeersDrink beer fresh. Beer is for drinking, not for storing. Don’t wait for your beer to age. OK, you can store beers for months successfully, but they're best enjoyed fresh. If you're a homebrewer, serve your stouts and ales and enjoy them with friends and family. When you run low, you can always make more. If you're buying commercially brewed beer, don't buy more than you will drink within a month or two. It takes up space in your home, and it could go bad before you finish it. Plus, with commercial beer, if you run low, fresh beer is available at the nearest supermarket. RefrigerateBeers stored in your refrigerator will last at least two months longer than beers stored at room temperature. Refrigeration also keeps out UV light. If you're a true beer lover, consider adding a refrigerator designed for beers, which will allow you to keep your brews at the perfect temperature for storing or serving. Keep your beer cold, people! Dark is BestIf you do decide to store your beer at room temperature, make sure it is in a dark place with no direct sunlight. For example, a cool closet in your bedroom or a corner of your basement might be ideal for storing your beer. Keep Bottles UprightStoring beer bottles sideways doesn't make sense. They're more apt to roll that way, and they're also more likely to become oxidized since sideways storage exposes more of the beer to oxygen. The Take-AwayFollow these tips for beer storage, and you'll always have a fresh lager, porter, or IPA to enjoy. Remember, rotate so you can always drink the oldest first, keep your beers cold, and avoid storing them on their sides to enjoy a crisp beer each and every time! The post How Long Does Beer Last in the Fridge? appeared first on Winning Homebrew. |
| You are subscribed to email updates from Winning Homebrew. To stop receiving these emails, you may unsubscribe now. | Email delivery powered by Google |
| Google, 1600 Amphitheatre Parkway, Mountain View, CA 94043, United States | |


0 comments:
Post a Comment