
Winning Homebrew |
- Decoction Mash
- How To Make Potato Vodka
- The Best Brew Kettles For Your Homebrewing Needs
- How To Make Moonshine
- How To Make A Moonshine Still
| Posted: 07 Jun 2021 08:34 AM PDT Whether you’re a seasoned beer meister or a novice homebrewer, you’ve probably heard of using a decoction mash. You may even have a few opinions about it. After all, decoction brewing methods are both ancient and controversial. So it’s no wonder modern brewers love to debate their pros and cons. Commercial breweries have indeed moved away from decoction mashing. It’s not a very efficient or streamlined process, and producing a product in bulk is a challenge with a decoction mash technique. For home brewers, though, decoction mashing can provide benefits. It can create crystal-clear finished beer and an exceptional malty flavor, similar to what you find in traditional European lagers. And, with modern technology, like thermometers, you can use decoction techniques in a simplified form. So, let’s dig into this time-tested technique. Below we discuss decoction mashing thoroughly, covering what it is, where it came from, and how you can do it at home. What Is Decoction Mashing?Decoction mashing is an all-grain brewing method for increasing the mash-in temperature in incremental steps. Sometimes referred to as a step-brewing technique, it’s both traditional and intense. However, it’s one of the only tried and true ways to mimic classic flavors found in central European beers. Decoction mashing is a three-part process that generally looks like this:
This traditional technique was universal to brewing historically. Today, it’s become much more controversial, but we’ll get to that in a moment. First, let’s look at the history of decoction mashing techniques. It’ll help us better understand the purpose behind this time-consuming traditional method. And, it will help you decide if it’s worth the extra energy decoction mashing requires. History of Decoction Mashing Historically, decoction mashing was necessary to brew delicious beer. There were two reasons for this:
Humans have been brewing beer since at least 5,000 B.C. Thermometers, though, weren’t invented by Daniel Fahrenheit until 1709! That meant, for a very long time, humans had to use other means to monitor and control the temperature in their brews. In the absence of thermometers, you can reliably increase the temperature of your mash using boiling water. However, adding additional water dilutes the mash and increases its volume. In other words, it might run over the top of the tun, and the results won’t be very tasty. So, early brewers probably tried to remove liquid from their mash, heat it, and then add it back. Unfortunately, that creates problems too. Enzymes reside in the liquid portion of the mash, and enzymes are easily denatured at boiling temperatures, rendering them ineffective. Though early brewers almost certainly had no clue what an enzyme was, they would have quickly discovered removing, boiling, and adding back the mash water alone doesn’t work. Without enzymatic activity, starches can’t convert to sugar, which means there’s nothing for the yeast to feast on. So, you can kiss fermentation goodbye and say hello to malted grain tea, which is pretty gross, in our opinion. It’s likely that early brewers switched tactics and began to follow a decoction mashing method similar to what we might use today. However, instead of pulling liquid decoctions, they switched to pulling out the mash solids with just a little liquid. They would boil the grains separately and then add them back to the mash, thereby raising the mash’s temperature in a reliable and repeatable way, without destroying enzymes. Doing this had another benefit. Malted barley at the time was under-modified in general. Boiling the grains softens them further by bursting the starch’s cell walls. With the cell walls out of the way, the enzymes can easily get to the starch within. The result is a stronger beer with the same sweet maltiness, which early brewers almost certainly appreciated. Decoction Mashing Today: Pros and ConsToday, we have thermometers and fully modified malts. So, is decoction mashing worth the extra time and effort it takes? Well, it depends on who you ask. Modern Fans of Decoction MashingThroughout Germany and the U.K., especially, you’ll find many fans of decoction mashing. It’s not because they’re Luddites who refuse to use thermometers. And it’s not because malts are lower quality on the other side of the pond. Modern fans of decoction mashing do it because of the flavor it imparts. When you pull grains from the mash tun and heat them to high temperatures, you can induce the Maillard reaction. If you like to bake bread or grill meats, you may have heard of the Maillard reaction before. It’s really a series of browning reactions that create malty, toasty flavors, and deeper color. It’s responsible for the crust on your steak as well as on your sourdough loaf. It makes food taste better, and it does the same for beer. Proponents of decoction mashing also claim that the process creates superior foam in your final brew. Foam quality and head retention have to do with the proteins in your decoction wort, though. And, decoction mashing techniques vary. If you’re using under-modified or moderately modified malts, the protein rest that decoction brewing calls for will break proteins up and provide better head retention. With fully modified malts, larger proteins will break down, and the resulting foam will be unstable. So, while decoction brewing certainly affects the foam of your beer, it’s not always for the best. What The Haters Have To SayMany modern breweries and homebrewers have ditched the decoction mash method. They say it’s simply not necessary with today’s equipment. Well-modified malts are readily available, and everyone has access to a thermometer. As they point out, an infusion method is far easier, and you’ll get similar results. In addition, adding a little melanoidin malt to your mash will create additional flavors similar to decoction mash methods. However, it’s not exactly the same. If you’re a true fan of traditional brewing flavors, the kind you find in real-deal pilsners, Bochs, and hefeweizens, the decoction method is the only surefire way to get there. Before You BeginIf you want to try a decoction mash method, there are a few things to know before you begin. Let’s go over them. What Equipment Do I Need For a Decoction Mash?Though decoction mash methods were developed without modern equipment, having a few standard pieces can help modern homebrewers. You can use a traditional 3-vessel set-up, brew-in-a-bag options, or even an all-in-one system with a decoction mash. On top of that, you’ll need:
Decoction Volume CalculationsTraditionally, each decoction uses the thickest 1/3rd of the mash. That rule of the thumb came from ancient brewers who weren’t making advanced calculations for their brews. However, it still works well with a 3-vessel all-grain mash system. However, homebrewers today use a wide range of equipment, including brew-in-a-bag pieces. So, to be more specific, you can calculate decoction volume using the following formula: Decoction Volume = Total Mash Volume * (Target Temperature – Starting Temperature) / (Mash Boil Temperature – Starting Temperature) Make sure the volume of your decoction kettle can handle at least 25% more than your calculated decoction volume to accommodate space for boiling and stirring. Types of Decoction MashingIf you’re going to use a decoction mash, there are a few ways to go about it. The most traditional technique is known as a triple decoction. Unfortunately, it’s lengthy and rarely used today, even by fans of decoction mashing. However, understanding it makes practicing other, more modern decoction mash techniques that much easier. So we’ll detail the process in full below, and then we’ll run through double and single decoction mash techniques. Triple DecoctionA triple decoction has four mash rests to be aware of:
Traditionally, these rests are long, but many modern brewers who practice triple decoction shorten the rests to account for fully modified malts. Ideally, you would use under-modified malts that can withstand the longer rests without breaking down. Some maltsters sell under-modified malts precisely for this reason. It’s also ideal to have a brewing partner with this technique. Each time you pull a decoction and bring it to a boil, you’ll need to stir it regularly. It can be tricky to mix your decoction while keeping an eye on your main mash. Step One: Mash InTo start a triple decoction mash, heat your strike water to around 99℉. Remember, brewers developed the triple decoction method before the advent of thermometers, so most of the temperatures are easily identifiable. In this case, the strike water temperature should be just above body temperature; it will feel neither hot nor cold if you were to run your hand through it. For light beers, you’ll want 2.3 – 2.6 quarts of water per pound of grist or grain. For dark beers, you need less. 1.4 to 1.9 quarts per pound of grain will do the trick. Step Two: Acid RestAt around 99℉, the enzyme phytase activates, which will lower the pH of your mash. Allow the mash to rest here for about 20 minutes. Step Three: Pulling and Heating the First DecoctionTo pull the first decoction, you scoop out the thickest portion of the mash, aiming for about 1/3rd of the total mash volume. If you’d like to use a more exact measurement, you can use the decoction volume equation we provided earlier. The target mash temperature will be 122℉. Once you pull your decoction, you’ll heat it in a separate pot (your decoction kettle) to around 150℉. Then, let it rest for 15-20 minutes. The rest allows the starch conversion before you destroy the enzymes with boiling water. Be careful not to scorch the grains as you heat them. We suggest heating slowly and stirring regularly! Step Four: Boil the First DecoctionAfter resting the decoction, it’s time to turn up the heat and beer from bread bring the decoction up to boiling. For light beers, the decoction boil time is 5-15 minutes. For darker-colored beers, you’ll need to boil them for 30 minutes or more. The longer you boil, the more color and caramel flavors you’ll create. Step Five: Return the Decoction Mash for the Protein RestAfter the decoction is done boiling, you’ll return it to the main mash. The goal is to raise the entire temperature of the mash to about 122℉. Use a heat-proof jug and a sieve to return the decoction to the mash slowly. Remember, the decoction will be hot, so be cautious and don’t rush. Once you reach the target mash rest temperature of 122℉, stop adding the decoction and allow the mash to rest for 15-30 minutes. If your mash reaches temperature before adding all of the decoction, chill the remaining decoction separately to 122℉ and then add it back to the mash. Step Six: Pull the Second Decoction, Boil, and Perform the Saccharification RestAt this point, you repeat the decoction process (steps three, four, and five). If you’re using the decoction volume calculation, your target temperature will increase to 145℉. In other words, once you add the second decoction back to the main mash, the temperature should be 145℉. Resting the mash at this temperature will create the rich malt flavor you’re looking for as the process converts starch to sugar. You can rest the mash for as little as twenty minutes here, but traditional methods called for resting the mash for closer to an hour. If you’re using under modified malts as we suggested, the longer rest will be beneficial. Step Seven: Pull the Third Decoction, Boil, and Perform Mash OutRepeat decoction steps three, four, and five again. This time the target mash-out temperature is 170℉. Then complete the mash-out rest; usually, 10-15 minutes is sufficient. Step Eight: Sparge and Finish the BrewYou can batch sparge, fly sparge, or no sparge. That part is entirely up to you. Then collect the total volume of wort in your brew kettle and finish, just as you would any other brew. Single and Double DecoctionsWith fully or moderately modified malts, homebrewers who want to use a decoction mash often shorten the process to double or single decoction. The double decoction mash omits the acid rest at the beginning. Instead, you start with the protein rest. Then you’d pull the two remaining decoctions to reach the appropriate saccharification temperature and mash out. Single decoction begins with the saccharification rest. You’ll pull one decoction to reach mash-out temperatures. Regardless of whether you use triple, double, or single decoction, there are several variations you can make as a brewer to suit your preferred malts. Duration of rests, the heating rate, and the number of rests are all modifiable. In the next section, we’ll focus on a much more practical process for a decoction mash. While the above method worked and was undoubtedly ideal for historical brewers, the next method we feature is better for modern-day malts, using standard equipment. How To Use a Decoction Mash In Your Next HomebrewIf you want to develop traditional distinctive flavors in your beer, using a decoction mash is crucial. That’s especially true if you’re brewing a Bavarian or German-style beer. However, you don’t need triple decoction to get there. Below, we discuss the Hochkurz technique. Hochkurz is German for “high and short.” The mash begins well above the standard protein rest temperature, and it requires less time there. So, it’s literally a high and short method for brewing beer. Hochkurz TechniqueThe Hochkurz technique is a double decoction method that uses the same process of decocting the thickest part of the mash, heating it, and adding it back in. It looks like this:
The Hochkurz technique relies on specific temperatures that you need a thermometer to find. Each temperature encourages a particular enzyme. The first rest is sometimes called the beta-amylase rest because it encourages the beta-amylase to work quickly. Beta amylase is responsible for cleaving maltose from complex molecule chains, and maltose is the primary sugar for fermentation. So, the first rest is vitally important. The second rest encourages alpha-amylase activity. This enzyme also degrades sugar molecules into digestible components, encouraging good fermentation later on. Technically speaking, you don’t even need decoction to use the Hochkurz technique. Hot water additions and direct heat methods will also work. However, adding extra water means thinning out your mash, which isn’t necessarily ideal. And, direct heat methods may not work with your equipment. So, a decoction is a popular choice for using the Hochkurz technique. You do need well-modified malts to make this technique work. Attempting it with under-modified malts will yield poor results because it’s a much shorter method. A triple decoction mash process can take between 3-1/2 and 5 hours; generally, the Hochkurz technique takes about two hours. Well-modified malts don’t need the extra rest to convert their starches into sugars, but under-modified malts do. Frequently Asked QuestionsBefore we close, let’s go over a few common decoction mash questions. What Styles Benefit Most From a Decoction Mash?As we mentioned above, a decoction mash is common for central European beer styles. Continental Lagers like Bochs and hefeweizens do incredibly well with a decoction mash method. Pilsners, helles, and dubels are excellent candidates too. A decoction mash will increase their maltiness and provide a better mouthfeel. Can I Use My Boil Kettle as a Decoction Kettle?Yes. Many homebrewers use their boil kettle as a decoction kettle, but that comes with a significant downside. You’ll have to thoroughly clean out the grain before sparging, which can be a tiresome task. It’s easier to have a separate kettle on hand. If I Have Well Modified Malts, Is There Any Benefit to a Decoction Mash?With well-modified malts, like an American 2-row malt, a decoction mash isn’t necessary, and in some cases, it may be detrimental. However, many find benefits in using single or double decoction methods with well-modified malts. A single, or sometimes double, decoction can add malty flavors, caramel colors, and better mouthfeel even with well-modified malts. The trick is not to rest the mash too long. Traditional resting times suggested in triple decoction methods will hurt the quality of well-modified malts. Final ThoughtsTraditionally, decoction brewing was a beast of a technique. It took a day of babysitting your mash, and most of us don’t have time for that. Luckily, modern technology allows you to shorten the process without sacrificing flavor and quality. By using well-modified malts with a single or double decoction, you can increase the sweet, caramel flavor and color of your brews. And we think that’s a very cool thing! After all, homebrewing is all about innovation and discovery. Using a decoction mash is one more way to expand the creative potential of your homebrewing and create a tasty beer. It allows you to experiment with malty flavors and caramel colors, creating brews similar to traditional Bochs and pilsners. We call that a win! The post Decoction Mash appeared first on Winning Homebrew. |
| Posted: 07 Jun 2021 08:22 AM PDT Delicious potato vodka is easily one of the most popular varieties of vodka. It's especially famous in Russia, where adults may drink as much as one bottle every two days. In this guide, you'll learn more about the four primary steps of making a basic potato vodka recipe, as well as get tips and advice for doing it correctly. Warning: Brewing Vodka At Home Is Usually IllegalState laws vary, but brewing drinks like vodka at home is often illegal in the United States and throughout many other parts of the world as well. This guide is not intended to help you violate any laws against producing alcohol at home that apply to your area. If you want to brew vodka at home, look into getting an appropriate license in your area. Some parts of the process described below are dangerous and could result in injury or death if performed incorrectly. Legal distilleries have the training and equipment to monitor the vodka production process and ensure that the final liquid is safe to drink. Make sure you follow all quality control regulations when making vodka, even if you have a license to produce it at home. Part One: Making Potato MashNo, not mashed potatoes, which are something else entirely. For those who aren't familiar with the term, mashing is the process of heating certain types of grain in water. This helps turn starches into sugar, then dissolves the sugar into the water, creating an environment where fermentation can turn the sugars into alcohol. To get a quality potato vodka distillate, you need a quality mash. You'll need these supplies:
See that asterisk by the gallons of water up there? Unfortunately, many people overlook this when trying to make vodka for the first time, and it can cause a lot of trouble. For brewing, good water should be reasonably hard but with no iron in it. You may need to test your local water supply to be sure it's appropriate. Iron can deactivate enzymes that convert potato starches, which ruins the entire mashing process. You'll need more of the same type of water in future steps, but ensuring all the water is good from the start helps avoid problems. The mash recipe is simple if you follow these steps. Step 1: Scrub Your PotatoesStart by thoroughly scrubbing all of your potatoes with a produce brush to remove any residual dirt. Don't be afraid to get aggressive here. Cleaner is better, so don't worry about removing a little of the skin on top as well. Begin boiling the water while you're doing this to prepare for the mash production. Step 2: Cube The PotatoesCut the potatoes into relatively small cubes. This helps maximize the surface area, making it easier to cook the potatoes evenly and produce a better final result. Step 3: Boil For 20 Minutes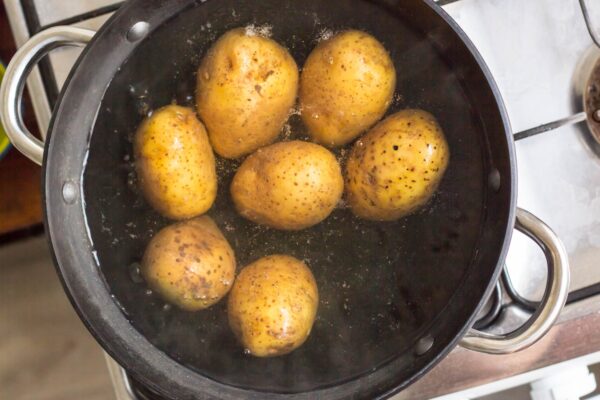 Boil all of your cubed potatoes in the seven gallons of water you started heating in Step 1. They should be done after 20 minutes, but don't be afraid to fine-tune the cooking time for future batches if your heat source is just a little off. Step 4: Mash The PotatoesYou can do this by hand, with an immersion blender, or with a potato masher. Up until this point, the process probably feels similar to making mashed potatoes for dinner. However, this is the point where things truly start to switch over to making vodka, not food. Once you're done mashing, open your crushed, malted barley bag, but set it aside for now. Step 5: Transfer The Potatoes To Your Mash PotDump your mashed potatoes into the mash pot. Add more water to reach seven gallons total inside the pot, which is the best quantity for this particular recipe. Once the fresh water is in there, heat the entire mixture to 140 degrees F. Stir it constantly until it reaches this temperature. Automatic stirring systems are useful here but not always available. Step 6: Add The Barley MaltOnce you reach your desired temperature, it's time to add the crushed malted barley that you opened earlier. Pour it into your mash pot, continuing to stir so you can ensure everything mixes evenly. Step 7: Cook The MixtureHold your fermentation mash at 140 degrees for 20 minutes. Stir the entire mixture for thirty seconds once every four minutes, which means stirring five times in total while it cooks. After the first 20 minutes, raise the boiler temperature to 152 degrees and maintain this constant temperature for one hour. Continue stirring it for 30 seconds once every ten minutes at this higher temperature. At this point, use your hydrometer and take a starting gravity reading. Our goal for potato vodka is exactly 1.065 by this measure. If it's too low, slowly add sugar to your mix. It shouldn't be any higher than 1.065. Step 8: Cool Your MashCool the mash down to 65-75 degrees. If possible, let this occur overnight and do it slowly, rather than trying to rush the process. This gives the barley enzymes greater opportunity to transform the starch in the potato into sugars. Part Two: Fermenting The MashMaking a sugary potato mash is fun, if time-consuming, but it hasn't even started becoming alcohol yet. That's where fermenting comes in. While you can buy a yeast starter for this if you truly want to, it's often easier to make it at home so you can have more control over the whole process. Get these supplies:
Step 1: Create Your Yeast StarterSanitize your mason jar. There are many ways to do this, but try to avoid using any harsh chemical residue. While you're sanitizing, heat water to exactly 110 degrees. Pour four ounces of this water into your sanitized jar. Remember that transferring water into new containers can reduce its temperature, so consider warming those containers before using them. We want to keep the water as close to 110 degrees as possible before it goes into the jar. Add two teaspoons of sugar to the hot water. Many people use simple white sugar for this, but you can modify the flavor of your drink by using other types of sugar instead. Add your yeast to the mix, strictly following the instructions on its packaging. These can vary somewhat, so always read the packaging for what type of yeast you bought. Stir the mixture, then let it sit for about 20 minutes. You should see the volume double over this period. Step 2: Transfer Your MashTransfer only the liquid from your mash mixture into your fermentation bucket. If possible, try to splash the liquid without losing any. This aerates the liquid and helps create a better product. The easiest way to transfer only the liquid is by straining it through something, which is what the cheesecloth is for. You can also use other types of strainers as long as they catch all the residual solids. Step 3: Add Your Yeast StarterOnce you have your yeast starter and the liquid from the mash ready, transfer your yeast starter into the fermentation bucket and give it a quick stir to mix it. Step 4: Seal And WaitSecure your fermenter bucket with a proper airlock and ferment the whole mixture inside the bucket for about two weeks. This is the longest part of making proper potato vodka, and there's no point in trying to hurry it along. Make sure to label your fermentation bucket so you can remember exactly when you started it. However, if you're not happy with the results, you can start on a fresh batch of vodka and use the experience from your previous attempt to try and do it better. Practice helps a lot, so the more you follow the steps above, the easier it will become to distill a high-quality product. Step 5: Check The FermentationOnce you're done waiting for it to ferment, it's time to check the process and see if it's done. Take a small sample from the mixture (often called the "wash"), carefully avoiding any solids that may still be present. If you strained the mix correctly, there shouldn't be any solids. Put the sample on a white plate or in a white bowl, then add a drop of iodine. This is a little chemistry trick to check for starches. If the mixture turns blue, the iodine is reacting with lingering starches, and it's not done fermenting. Let it sit for a few more days. Alternatively, you can use your hydrometer to check the fermentation process, but this is harder for amateurs, and I don't recommend it for your first few batches. Step 6: Strain The MixOnce you're done fermenting, it's time to strain the mix again. This will help catch any solids that are left in your liquid alcohol, including those that are small and hard to see. Once again, cheesecloth is a great choice for this. Part Three: DistillingAt this point, your vodka exists. You just need to extract it from the existing mixture. This is the heart of brewing, and like the previous steps, it takes experience to do this correctly. Don't worry if your first few batches seem wrong. You'll improve naturally if you keep brewing. Collect the following:
Step 1: Clean Your StillAlways clean your still before you start using it, even if you cleaned it after the last time you used it. This helps remove dust, dirt, and any other debris that could contaminate your drink. The owner's manual for a still typically has the cleaning directions, including any suggested products or things you should avoid doing. Always follow these instructions exactly. Deviating from the manufacturer's advice could damage your still or your drink. Let the still dry after you're done cleaning it. Step 2: Add PackingClean copper packing is the best choice for distiller column packing here, but you can use other materials if you want to. We suggest copper packing material because it helps maximize reflux, which is essential for high-proof alcoholic drinks. Double-check all of the hoses, attachments, and joints in your still to be sure they're all right, then siphon your strained mash water into the still. Now, it's time to start the real fun. Step 3: Run The StillTo make a top-shelf product, run your still according to the manufacturer's directions. In general, producing potato vodka involves turning on the cold water once your boiler reaches 130 degrees, and the still will start producing actual vodka once it reaches 170 degrees. Keep the heat constant. If necessary, adjust the temperature a little to modify the rate of flow for your vodka. One to three drips each second is a good rate. Any faster than that, and you're probably rushing things, while any slower means you can nudge the temperature up a bit more. Part Four: Collecting Your VodkaCollecting vodka is partially a matter of skill, especially when estimating how much of the process is done. Using labeled bottles and rotating them through as needed will help a lot. The vodka itself is divided into four parts when it comes out of the still. Each part can be measured by its approximate volume if you paid attention to the quantity of liquid you’re working with. The first 5% of each run are the foreshots. Foreshots contain methanol, which is why we're going to throw it out unless you're collecting that chemical for another reason. Methanol is poisonous to humans, and drinking foreshots can lead to blindness or death. Do not drink the foreshots under any circumstances. Do not sniff them or taste them, no matter how curious you are. Just throw them down the drain and move on to the next part of the process. The next ~30% of your run is known as the heads. The heads of a vodka run contain acetone, a volatile alcohol that is not particularly toxic but can give nasty hangovers. Acetone is also rather smelly, so it's easy to identify when it's in a bottle. In most cases, unless you're collecting acetone for some reason, it's better to throw these out as well. Once you're past the heads, it's time for the high-quality hearts, which are the next 30% of a vodka run. This is the good stuff. The smell of acetone should be mostly gone here, replaced with the sweeter-smelling ethanol that we want. Bottle and save the clean hearts as you prefer. The remaining 35% of a vodka run is known as the tails. These contain some protein and carbs that throw off the taste, and you'll notice a distinct drop in sweetness and an oily film once you reach this point of a run. Some people like to run the tails through a still to squeeze out a little more of the hearts. This isn't necessary for smaller-scale distilleries where it's more time-effective to make a new batch, but if you're allowed to make vodka at home, it's more viable. Special: Cutting Your VodkaCutting is a slightly strange term for producing vodka, considering it's rather difficult to truly cut a liquid. Once you've finished distilling, you should have an extremely high-proof spirit. For example, freshly distilled vodka is usually 190 proof, or 95% alcohol content by volume, although some distilleries will use techniques to push it as high as 195 proof. This is, frankly, too much for most people. That's why the next phase of the process is optionally filtering the vodka (activated carbon is a popular choice), then mixing it with purified water to reduce the drink down to about 80 proof, or 40% alcohol by volume. Adding the water is known as cutting the drink. For the best results, try using water that you've put through reverse osmosis. The purer the water, the better, as even trace amounts of minerals can heavily affect the flavor of the final drink. 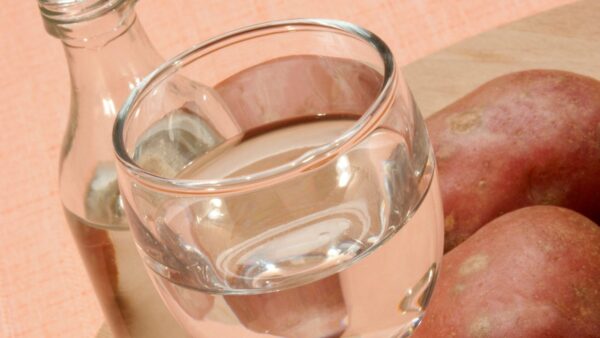 Frequently Asked QuestionsHere are some of the most common questions that people have about making vodka. Is Vodka Flavorless?No. As Wine Enthusiast points out, vodka has a variety of mash types, basic ingredients, and flavors. These are quite apparent to experienced drinkers, although newcomers may find it harder to pick up some of the subtler nuances. That said, while vodka isn't flavorless, it does tend towards a neutral profile. Some buyers prefer having the most neutral-tasting vodka possible because that helps ensure it won't throw off existing cocktail recipes. Federal statutes updated in 2020 support this definition, as they no longer require vodka to be without distinctive tastes. Can You Age Vodka?Theoretically, yes, but there isn't much point in aging your distilled product the same way you age whiskey. The main reason for this is that finished vodka is almost entirely alcohol and distilled water. Therefore, there's very little to change by aging its natural ingredients. Instead, aging vodka is more likely to result in it absorbing the flavors of the wood. In short, aged vodka will probably taste like oak. However, if you want to get creative, you can try aging vodka in used casks. Wine and bourbon casks, for example, could impart residual flavors into your vodka and produce a more complex, interesting drink. This is similar to the process for producing starka, an eastern European beverage that's about halfway between whiskey and vodka. You won't find much serious production of aged vodka, though, so this is mainly the realm of experimentation and creativity. Can You Infuse Vodka?Yes. Infusing alcohol is significantly faster and easier than attempting to age it, and it's an excellent way to add new flavors to an otherwise-finished drink. This is especially useful if you want to make cocktails and add new flavors without adding new ingredients and potentially throwing off the ingredient ratios. Infusing vodka is a fairly simple process. Start by getting a few glass jars with solid lids. Mason jars tend to work best, but they're not reusable like other sorts of lids. Once you're ready to start, put a few pieces of whatever ingredient you're infusing into the jar. Fruit is a common choice, but you can also use herbs like basil, whole vanilla beans, chili peppers, or nearly anything else. Make sure anything you put in is washed and cleaned, though. Cut up any large ingredients (like pineapple and mango). Avoid ground spices, though, and use whole spices instead. Straining ground spices out of infused vodka is a pain. If you're particularly inquisitive, you can try mixing several ingredients into one infusion. It's usually better to do one ingredient at a time, though, and mix the results instead. After adding the other ingredients, pour your vodka over them and seal the jar. Shake the jar several times a day for about five days. After that, your infusion should be done. Finding the best ratio of ingredients to vodka can be tricky, so don't be afraid to experiment a little. Once you're done infusing, strain out the extra ingredients and pour your vodka into a new, clean jar. If you used perishable ingredients, store the jars of product in the fridge. If you used shelf-stable, quality ingredients, you could keep your infusion in the cupboard instead. Can I Make Vodka From Other Ingredients?Yes. You can make a good vodka product from practically any grain, although it may require a recipe that's different from the one above. People often use wheat, rye, rice, or corn to create different types of mash for vodka, and these are widely available on store shelves. Some people also make their favorite spirits from rarer ingredients. The most notable of these are fruit-based variants, such as apple and grape vodkas. A few people have even made vodka from maple sap and honey. (That may sound strange at first, but remember, honey is the main ingredient for mead. It's not especially strange to use it for making other alcoholic drinks.) Alcohol brewing is an art form. The key factor for making perfect spirits from any ingredient is the ability to get sugar from it. That's what the fermentation process converts into alcohol, and once you can do that, making batches of potato vodka is mostly about the straining and distilling process. The post How To Make Potato Vodka appeared first on Winning Homebrew. |
| The Best Brew Kettles For Your Homebrewing Needs Posted: 05 Jun 2021 07:18 AM PDT The brew kettle is where all home brewing begins, no matter which brewing method you use. With all of the options to choose from, it can be hard to choose what's best for you. All of our reviewed kettles are steel. No aluminum kettles here! It increases the brew kettle weight but increases the quality of your kettle. We've reviewed some of the most popular brew kettles to help you decide on the perfect kettle for your homebrewing needs. Brew Kettles for All BudgetsBayou Classic Stainless Steel 20 Quart Brew Kettle Sale  Bayou Classic, Stainless Steel Brew Kettle, 20 quart
If you're looking for a straightforward, cheap brewing kettle, the Bayou Classic is an excellent option. This five-gallon kettle is great for new brewers who aren't yet sure what features they'll need. What We Love:
What We Don't Love:
GasOne 8 Gallon Stainless Steel Home Brew Kettle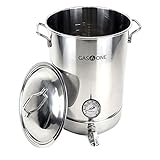 GasOne 8 Gallon Stainless Steel Home Brew Kettle Pot Pre Drilled 4 PC Set 32 Quart Tri Ply Bottom for Beer Brewing Includes Stainless Steel Lid, Thermometer, Ball Valve Spigot - Home Brewing Supplies
This GasOne homebrew kettle is a bit more expensive than the Bayou Classic, but the additional features are worth it. Start here if you're more experienced in homebrewing or just willing to spend a little more. What We Love:
What We Don't Love:
Anvil 5.5 Gallon Brew Kettle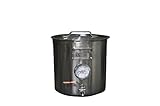 Anvil - ANVkl5p5gl Brew Kettle, 5.5 gal
We know never to judge a book by its cover, but this Anvil brew kettle even looks cool. It has all the features you would expect from a specialized brew kettle, just a little higher-end. What We Love:
What We Don't Love:
Northern Brewer – Megapot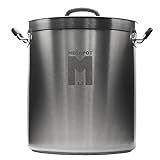 Northern Brewer - Megapot 1.2 Stainless Steel Brew Kettle with Volume Markings (10 Gallon Plain)
This 10-gallon kettle is produced by longstanding equipment vendor Northern Brewer Homebrewing Supply. They've been crafting beer brewing kettles for over 20 years, so they know what they're doing. They make their steel kettle customizable in just about every way you can think of. What We Love:
What We Don't Love:
Concord Stainless Steel Home Brew Kettle CONCORD Stainless Steel Home Brew Kettle Stock Pot (Weldless Fittings) (40 QT/ 10 Gal)
This Concord brew kettle is a nice, happy medium in terms of both features and price. It's not the heaviest brew kettle or as fully featured as some more expensive models. But it's got quality extras that make better brewing accessible to the budget-conscious beer brewer. What We Love:
What We Don't Love:
What You Need to Know Before You BuyHow Does Home Brewing Work?All home brewing begins with breaking down grains into a liquid called "wort," then adding hops for flavor and yeast for fermentation. The liquid is left to ferment for a period that varies, depending on the type of beer. Then, the brewer adds a little sugar for carbonation and leaves it a while longer. Finally, the beer is filtered and bottled or kegged and ready to be enjoyed. What Does the Brew Kettle Do?Technically, you can start the home brewing process with any large pot and a hand-held thermometer. Unfortunately, most new brewers don't have a large enough vessel in their own kitchen. Some homebrewers will tell you to boil in a smaller pot, but this is a controversial subject. It's best to start with something massive. A brew kettle is basically a specialized pot designed specifically for the indoor brewer. It's packed with features that make your job easier and more fun. For example, most brew kettles have a built-in coupler to help you transfer the liquid mess-free. Some include a temperature gauge or even a built-in burner, but these are more expensive. Do I Really Need a Fancy, Expensive Pot?Not necessarily. The most important feature is the size of the pot. You could get by with a 5-gallon soup pot, if you had one, or buy an inexpensive one at a restaurant supply store. As long as there's enough room for all your ingredients to boil, it will get the job done. Still, homebrewing technology has evolved for a reason. The right equipment makes it easier for you to brew better beer. A standard brew kettle is nice, but additional built-in features like couplers make less of a mess, and temperature gauges give you more control over the process and the final product. Are There Different Home Brewing Methods?There are three main types of home-brewed beer. First is the extract method, which begins with a ready-made malt extract, saving the brewer time and work. The second is the all-grain method, which is like a prequel to the extract method. When you decide to try all-grain brewing, you'll essentially be making the malt extract yourself. This is, of course, more work and harder to do. The third method, called partial-mash, lets you do a little bit of both. You make a smaller amount of mash yourself and use a little bit of ready-made extract. This allows you to experiment with the all-grain brewing method without investing as much money in a much larger kettle. Which Method Is Best for Beginners?The extract method is generally the best way for new brewers to get started. It's an excellent way for you to learn the basics of home brewing and doesn't require as much expensive equipment. Once you get comfortable with the extract method, you may want to begin experimenting. For example, you could try partial-mash or even all-grain brewing. By then, you'll know more about what makes a great extract, so you can make your own. What Other Equipment Will I Need to Get Started?Homebrewing is, at its core, a kitchen experiment, so you don't need a lot of specialized equipment. If you're on a budget, you can find a lot of what you need in your hardware store at affordable prices. It just takes a little elbow grease and creativity to make it work for your first home brewing experiment. If you're not sure what equipment you'll need, you can leave it to the experts. Most reputable home brewing specialty stores sell starter kits. These include all the essential items you'll need to get started. They may also have upgraded kits available if you don’t mind the price difference. Frequently Asked Questions (FAQ)What Is a Brew Kettle Used For?The brew kettle is the first stage of the home brewing process. Here, you boil the grains and/or extract to break them down and prepare them for the yeast to ferment. How Big of a Brew Kettle Do I Need?We recommend a tall kettle that can hold a minimum of 5 gallons. Beyond that, it depends on what type of brewing you're doing and how much beer you're trying to make. The VerdictOf all of these steel brew kettles, our favorite is the Concord Stainless Steel Home Brew Kettle. It includes features typically reserved for more expensive models, making it a great choice for any home brewer. So whether you're just getting started with homebrewing or you’re more experienced and looking to upgrade, we think you'll be happy with this model. The post The Best Brew Kettles For Your Homebrewing Needs appeared first on Winning Homebrew. |
| Posted: 05 Jun 2021 04:51 AM PDT DISCLAIMER: Making moonshine without a liquor distiller's license is illegal in most countries and can be dangerous if done incorrectly. The side effects of drinking poorly-made moonshine include permanent blindness, respiratory paralysis, and death. Please use discretion.Moonshine is as old as it is infamous. From the rum runners of the 1700s to the tales of people going blind from drinking these alcoholic beverages during the prohibition of the 1920s, all the way to today's homebrewers, moonshine has a long and scandalous past. So what is it about homemade moonshine that draws us in? Why did people risk breaking the law for making it? Why do people still risk it? The answer lies in satisfaction. Moonshine has a unique, sharp flavor and is relatively easy to make. Many people take pride in making it themselves, and others still find it thrilling to toe the line of the law. For whatever reason, if you are interested in making moonshine, you can learn all about it here. We have covered everything you will need to know about the basics of distillation, from how to make your own still to how the distilling process works. We will also give you some tips to avoid making rocket fuel. So, let's start with the basics. What Is Moonshine?Moonshine (also known as corn liquor or backwoods whiskey) is a clear, unaged, homemade whiskey. It is made from corn, though you can make it from other things, and has a high alcohol content. Moonshine originated with Scottish and Irish immigrants and soon became a staple in North America. However, in 1791, Alexander Hamilton – yes, of the musical Hamilton – imposed a taxation law on moonshine that led to illegal, underground production. The name moonshine is thought to have come about shortly after this as people began making and selling it at night to avoid taxation. Illegal moonshine production is still in practice today, but licensed distillers also produce it to be sold in liquor stores.  What You'll Need
How Does Distillation Work?The art of moonshine distillation involves extracting and purifying alcohol from corn (or rye, barley, etc.) mash. The mash is first heated to extract the alcohol in the form of vapor. This vapor, once removed, is then cooled back to liquid, forming clear alcohol. It’s not a complicated process, but it is very sensitive and doesn’t like changes. How to Make a Moonshine StillWhile there are many options to buy a still, many people find it cheaper and more rewarding to make their own pot still. As you can see above, it doesn't take much to build a still, and you can find most of the supplies at your local hardware store. The process for making a still for pot distillation is relatively straightforward. You don't need to be an engineer to make one; just follow these simple steps. Step 1: Making the LidThe very first step is to drill holes in the mash pot lid. You will need to make one 1/8 inch hole and one 3/8 inch hole. Drill these holes opposite each other, a couple of inches from the edge of the lid. Use the file to shave off any rough edges. Step 2: Adding the ThermometerTake your cooking thermometer probe and wrap Teflon tape around the post up near the dial. Either digital or analog thermometers will work. Do this until the thermometer fits securely in the 1/8 inch hole. Then, apply hot glue around the hole to make a proper seal. As long as you use high-temperature hot glue, you shouldn't have to worry about it melting when you are distilling. Step 3: Adding the Compression AdaptorPlace the male end (the bit with the threads on the outside) of the compressor adaptor in the pot lid from the bottom. Secure it with glue. Step 3 ½: Shape the CoilAt this point, you will need to shape your coil. Adjust it so that most of the copper tube fits snugly in the bucket, leaving a few inches straight at the bottom end as a spout. This is very important for the cooling process. Straighten out the top end slightly to form an arch that will reach up from the lid across and down to the bucket. Be careful not to collapse the pipe. Step 4: Attaching the Refrigerator coilPut the female end (the nut with the threads on the inside) of the compressor adaptor onto the end of the refrigerator coil so that the open end faces out. Next, put the ferrule (the small bell-shaped thing that came with the adaptor) into the end of the coil. Finally, screw the adaptor together, connecting the coil to the lid. Step 5: Setting up the BucketUsing the 3/8 inch drill bit, make a hole at the bucket's base about an inch from the bottom. This is where the coil will come out, so be sure to drill the hole at an angle that matches the direction of the coil. Run the end of the coil through the hole so that an inch or two sticks out. Glue all around the hole to make sure there are no leaks. This will be your condenser. Optional Step 6: Extra SecurityIf the coil shifts too much in the bucket, use clamps or brackets to hold it in place. How to Make MoonshineStep 1: Make the MashWhile there are many recipes for moonshine that use different oats and grains, traditional moonshine is made exclusively with corn and a few other simple ingredients. To make a conventional moonshine mash, you will need corn, granulated sugar, yeast, and water. Start by grinding the corn into a meal or buy flaked corn maize. Next, soak it in water in the still before adding the sugar. Finally, add yeast and stir well. The yeast (either distiller’s yeast or bread yeast) is vital to the chemical process of fermentation. Step 2: IceFill the condenser with ice. This ice is vital as it will help cool the alcohol vapor back into liquid. If the coil is too short or you do not use ice, most of the moonshine will be lost to vapor. Step 3: HeatingTurn the hotplate on to just below boiling. The exact evaporation temperatures come down to preference, but the idea is to evaporate the alcohol slowly, so generally, lower is better. 172-210°F (78-99°C) is the ideal range, but I recommend staying around 200°F (93°C) for the best results. Keep the cooking temperature consistent. Step 4: Sit Back and WaitNow that you have set everything up, all you have to do is wait. As the mash cooks, alcohol will evaporate and rise into the pipe. As it travels down the length of the coil, the ice will cool it and turn it back into liquid. The liquid will then drain slowly out of the end of the pipe into whatever waiting glass container you have. This is the quality product you’ve been waiting for. Tada! Common MistakesWe all make mistakes. It's nothing to be ashamed of, but when those mistakes can have dangerous consequences, you might want to read up a bit before starting. Here are some of the most common mistakes distillers make. Incorrect MeasurementsMath is not everyone's strong suit, and neither is following recipes, but when it comes to distilling, you may want to double-check your calculations. Too much or too little of any ingredient can throw off the whole delicate process. Lack of TestingIf you are using a homemade still, you need to test it. Test it rigorously. Retest it. There are so many issues untested stills can cause. Trust me. You don't want to find a leak halfway through distilling or have a connection point explode. Using the Wrong MaterialsUsing the wrong materials for a homemade still is just asking for trouble. You should always avoid using a plastic container or metals like aluminum that can melt and leech toxins. Don't endanger yourself just to save a couple of bucks. Too Much HeatThough it may be tempting to speed up the process by upping the heat, that is a bad idea. Not only will turning up the heat ruin the brew and leave it with a burnt taste, but it can also lead to pressure build-up and explosions. Also, be careful if you have to handle an operating still. Touching a boiling hot still will lead to bad results for any exposed skin. Lazy CleaningMake sure you clean your entire setup after every batch of moonshine. If you feel particularly lazy and don't want to be bothered cleaning your still after each run, think again. Leaving residue, especially around the adaptor, can lead to unpleasant flavors in your next batch. Moonshine MashThere are many mash recipes for corn moonshine. As I wrote earlier, cornmeal is the primary ingredient for traditional mash. Corn mash makes a smooth, full-bodied, strong whiskey. While this is the old-fashioned method, some people do not enjoy the subtle corn flavor tones of the whiskey. There are many different ways to make a mash and so many recipes to choose from. If you are skilled enough at making moonshine, you can create your own brews. Keep in mind that you will need yeast for the fermentation process, no matter what moonshine recipe you use. Other popular flavored moonshine recipes include sugar shine mash, hybrid mash, and fruit mash. A hybrid mash usually uses equal parts of corn and sugar content. This helps to balance out that corn flavor without changing the classic taste too much. You can also add sugar to fruit mashes, but you don't have to, as there are natural sugars in fruits. If you choose to add sugar to a fruit mash, there are many great resources for balancing the amount of sugar to each fruit and how much sugar each fruit starts with. I recommend you read up on this if you want to make a fruit mash as, depending on your chosen fruit, you will need different amounts of sugar. Adding too much sugar can add a cidery flavor to your finished product. FermentingTo make a hybrid mash, you will need ten pounds of cornmeal, ten pounds of sugar, and half an ounce of yeast. You will also need ten gallons of water and an appropriate pot. Boil the water and add the cornmeal. Stir and cook until the meal is paste-like, then add the sugar and yeast. Mix thoroughly and cook. To start the fermenting process, remove the mash from the heat and cover it with a cloth. Store it in a cool dark place like a cellar and leave it to ferment. As fermentation occurs, brown or tan foam will bubble up. When it stops rising, all the fermentable sugar has been used up. This should take about two weeks, but you'll know when it hasn't bubbled for a few days that it’s ready. Once the mash is fermented, strain it with a cheesecloth. You can discard the remaining solids. Add the strained mash water to the distiller, and you are ready to start making moonshine. Frequently Asked QuestionsIf you still have some unanswered questions regarding the process of making moonshine, check out these frequently asked questions. Why is moonshine dangerous?The number one thing that makes drinking moonshine hazardous is alcohol poisoning due to the presence of methanol (methyl alcohol, also known as wood alcohol). When you do not distill moonshine properly, you may leave traces of methanol. Drinking as little as 10ml of methanol can cause permanent blindness, and 30ml can cause death. Can I buy ready-made moonshine stills?Absolutely. There are many moonshine kits and stills available, though most of them are pretty expensive. You'd be hard-pressed to find one for under $100 if you choose to purchase a ready-made, quality still. Can I distill other things in the moonshine still?Yes. You can distill almost anything alcoholic in a moonshine distiller. So long as there is alcohol to be extracted, it should work. This goes for different grains and oats as well as wines and liquors. Can I make fermenting any faster?While there are ways to speed up the fermenting process, most will not work with moonshine mash. The only tip that will genuinely help you speed up fermentation is to do as the name implies and mash. Mash the corn. Mash the fruit. Mash anything that's going to be fermented. This creates more surface area and allows more sugars to be fermented at once. The post How To Make Moonshine appeared first on Winning Homebrew. |
| Posted: 05 Jun 2021 04:01 AM PDT By now, you've probably learned a few interesting facts about moonshine and have a solid understanding of what moonshine is, how it's made, and where it's legal to drink. When I think of the word "still," I can't help but think of Granny Clampett and her jug marked "XXX" from the 1960s TV comedy The Beverly Hillbillies. While hilarious, it painted a pretty stereotypical, and not necessarily accurate, portrait of rural folks from Appalachia, but however campy the show’s premise, making moonshine certainly figured as a top hobby in the Clampetts’ world. So, where the law permits, and if you're so inclined, you can join Granny, the Baldwin Sisters of Walton's Mountain, and the many generations of real-life homemade moonshine makers and try your hand at making some yourself. But where to begin? Besides the ingredients for the mash, you'll need a still to make the moonshine in. Why Is It Called a Still?The word 'still' is short for "distiller," the distillation process mechanism. Fun fact: From 1993 to 2013, Adobe Acrobat™ used a component called the Acrobat Distiller that processed postscript files into PDFs. This suggested a likening of its conversion process to the purification of a product by distillation, similar to moonshine and other spirits. Distillation is the method of extracting a pure product from a less refined one via a heating and cooling process. More specifically, it separates a combination of liquids that have varying boiling points. Stills can also be used to turn salt water into drinking water in an emergency situation. In the case of your moonshine still, the process extracts the "pure" alcohol (technically called ethanol) from the "impure" fermented mash. The alcohol vapors separate from the water because its boiling point (173.1 degrees F) is lower than that of water, and it is the first to boil off when the mash mixture heats up. How to get started making your stillWhile many commercially-made stills are available to purchase, you can still build your own still, just like the old-timers (and fictional characters) did back in the day. So what better way to honor the moonshining tradition than to go old-school in the making of it? If this sounds like fun and you want to try your hand at building a homemade moonshine still, this article shows you what you need and how to do it.  Let's Start With the IngredientsWhat you'll be making is a "pot" still, which has three basic components: 1. A large pot in which to heat the mash, also called a kettle, vat, or boiler 2. A water jacket type condenser – a container of water and ice which collects and cools the resulting alcohol steam, thereby extracting the alcohol from the mash 3. A jar or other glass vessel to receive the alcohol after distillation Here is a basic list of what you need to build your moonshine still:
People often ask…Q: Can I use a pot or kettle that's not stainless steel or copper?A: No. Do not use aluminum, lead, tin, or any other metal for your moonshine pot. Stick to stainless steel, copper, or a blend of stainless steel and copper, such as a stainless-steel pot with a copper bottom. Look for 304 stainless steel and C100 copper for the best quality. Q: Can I use a wood stove as a heat source?A: Many water heating options will work, but the temperature must be controlled and kept steady during the distillation process. This is why a thermometer is critical. The optimum thermometer reading to heat your still is anywhere from 175 to 205 degrees F. Q: How long does it take to make one batch of moonshine?A: Making moonshine is not a quick process and takes some patience. It depends on the amount of mash you start with, the temperature, your equipment, and other factors. Expect to spend around 4 to 7 hours for a 5-gallon batch of mash. Safety TipsAlcohol is highly flammable. You should always operate your still outdoors or in a well-ventilated area if outdoors is not practical to give any stray alcohol vapors time to dissipate. Check your system for leaks with plain water before making a run. Anything that allows the escape of alcohol or vapor is a hazard, given its flammable nature. Keep a fire extinguisher on hand. Do not put out any alcohol flame with water. Always use a glass collection vessel, and arrange your apparatus to keep it well away from the heat source. Never make the bad choice to leave your still unattended while in operation. Read about moonshine safety in more detail here. Step 1: Readying the kettle (the vat)
Step 2: Attaching the thermometer to the kettle
Step 3: Coil the copper tubing to make the condenser
People often ask:Q: Do I need a special tool to bend copper tubing?A: Copper tubing is fairly soft, and you can shape it by hand. You can use a copper bending tool if you prefer, but be careful not to crimp the tubing too much, or it will affect the vapor flow. Step 4: Attaching the copper tubing to the kettle
If using compression fittings:If you prefer to use a compression fitting, you can buy them in the plumbing section of your hardware store. They come in a set of male and female ends. You'll need two sets, one for the kettle and one for the bucket. Note: If using a cooler-type container, the fittings are probably not long enough to fit through the thickness of the cooler wall.
People often ask:Q: Won't the hot glue melt once the kettle is hot?A: Be sure to buy high-temperature glue sticks for use with this project because they will be in direct contact with hot steam. Look for glue sticks with a melting point above 212 degrees Fahrenheit, the boiling point of water. You'll only be using heat well under that temperature, so any high temp resin will do. Step 5: Attaching the coil to your bucket or cooler
If using compression fittings:
Step 5: That's it! You've made a pot still!When you're ready to make your moonshine, add your mash to the kettle and fill the bucket with ice. Don't forget to place a glass container under the spout to collect the alcohol. Fruit or pickling jars work well for this and come with sealing lids when you buy them from the store. They come in many sizes, so have a few different ones on hand for catching the various stages of your moonshine. These types of jars were common in rural agricultural communities to preserve fruits and vegetables. This is why you might picture moonshine in a glass quart jar, not because it’s the best container for the job (though they are), but because they were always on hand! Frequently asked questions:Q: How much moonshine will I get?A: Expect to get about 20% of the volume of your mash; 1 gallon of mash will yield approximately 3-6 cups of ethanol and 5 gallons of mash between 1-2 gallons of ethanol. Q: How do I clean and store my homemade still?A: Clean your moonshine still with a 1:1 solution of vinegar and water, or use a product called PBW (powdered brewery wash). Add several cups of this mixture to your kettle and boil for 60 minutes, allowing the mixture to evaporate and condense through the tubing. Repeat with clean drinking water, and test the water coming out of the tube to ensure the vinegar taste is gone. If needed, you can scrub the inside of the pot using a brush with non-abrasive bristles. If you use flour putty, the heat process will harden it. Soak the hardened putty with water and scrape it clean with a steel-wool scouring pad. You should clean and dry your still after the end of each run, before you start your next run, or when unused for more than a few days. Store your homemade moonshine still in a dry, dust-free place and keep the parts dry between uses. Q: Does drinking moonshine make you go blind?A: Moonshine is pure ethanol, a grain-based alcohol that is the intoxicating ingredient of alcohol-based drinks. It does not cause blindness Methanol, or wood alcohol, will cause blindness when drank. However, methanol is not a distilled product, and therefore cannot come out of your still! Likewise, grain fermentation does not produce methanol. Even so, according to the FDA, a 1% level of methanol by volume or up to 600 mg per day is considered safe. Q: How long does the moonshine last?A: Sealed DIY moonshine usually lasts up to 2 years on the shelf. You don’t need to refrigerate it, but you can do so if you prefer. An opened jar of moonshine lasts about six months. The post How To Make A Moonshine Still appeared first on Winning Homebrew. |
| You are subscribed to email updates from Winning Homebrew. To stop receiving these emails, you may unsubscribe now. | Email delivery powered by Google |
| Google, 1600 Amphitheatre Parkway, Mountain View, CA 94043, United States | |


0 comments:
Post a Comment